
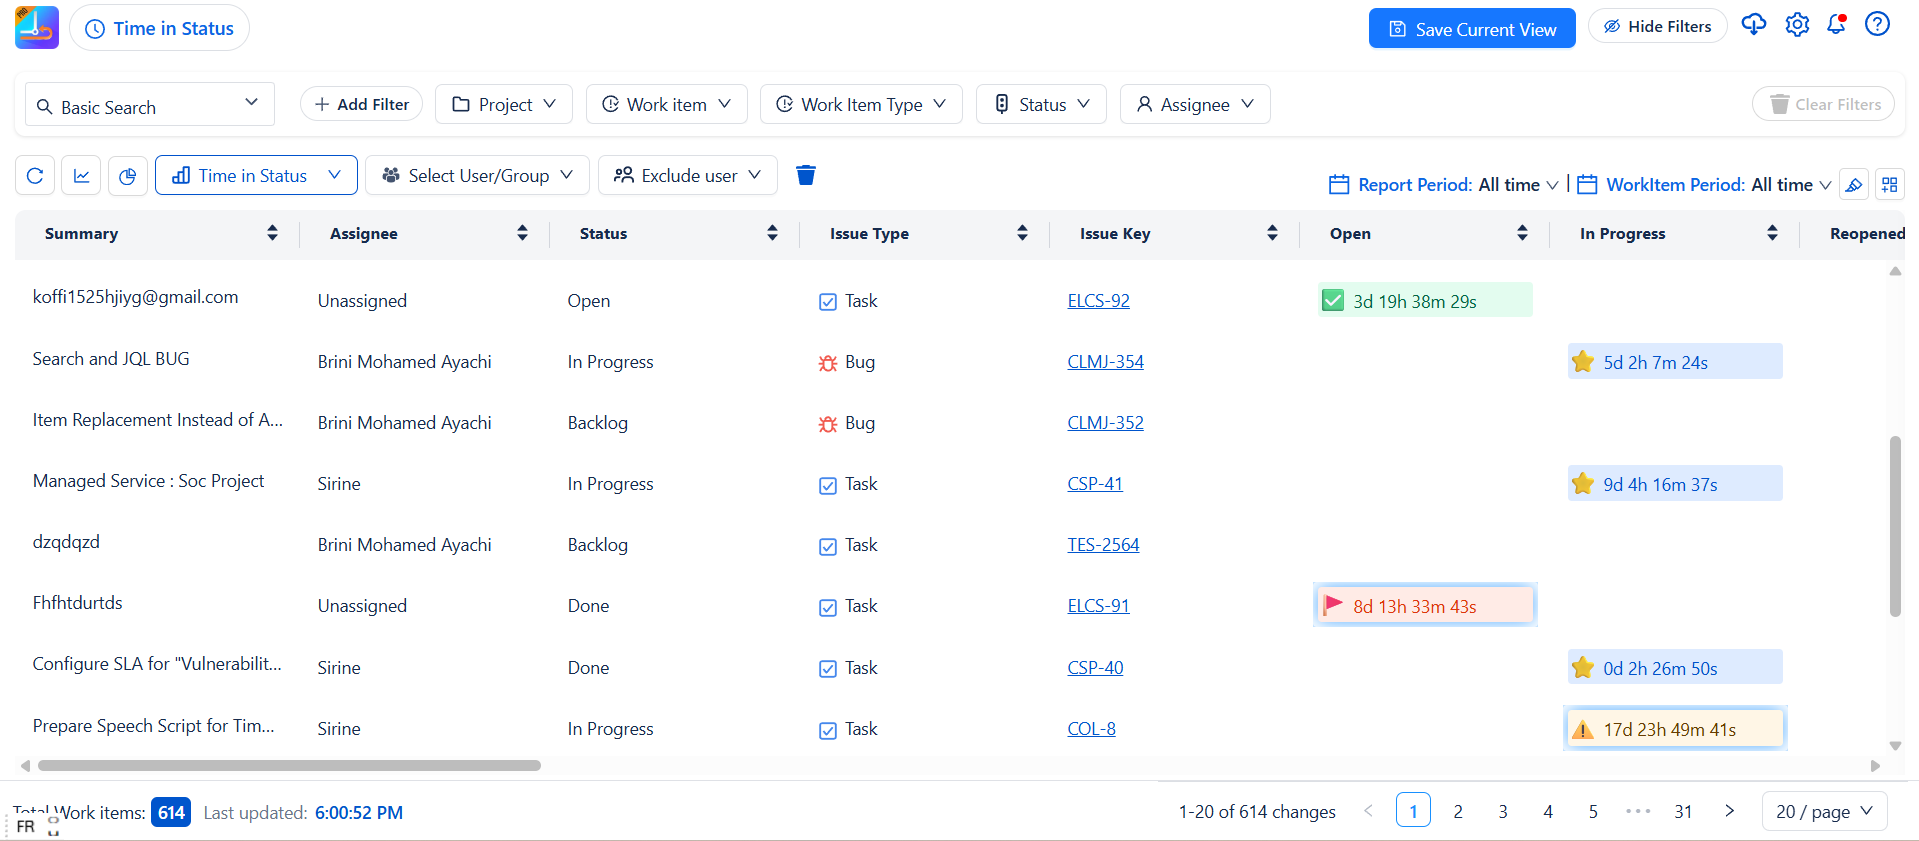
The Add Report Highlight feature lets you draw attention to key metrics in your reports, such as:
-
⏱️ Time spent in status (In Progress > 2 days)
-
📊 High-priority items approaching SLA deadlines
-
🎯 Other important metrics your team needs to watch
By highlighting critical data, your team can spot Work items faster, focus on what matters, and make better decisions. 🚀
Default Highlights
-
To make highlights simple and inspire your choices, each report type comes with pre-configured default highlights.
How it works:
-
When you open a report, you’ll see default highlights already available.
-
You can edit, delete, or disable them as you like giving you a quick starting point while keeping full flexibility.
Why it matters:
-
Saves time and guides you to highlight the most important data.
-
Lets you quickly customize reports without starting from scratch.
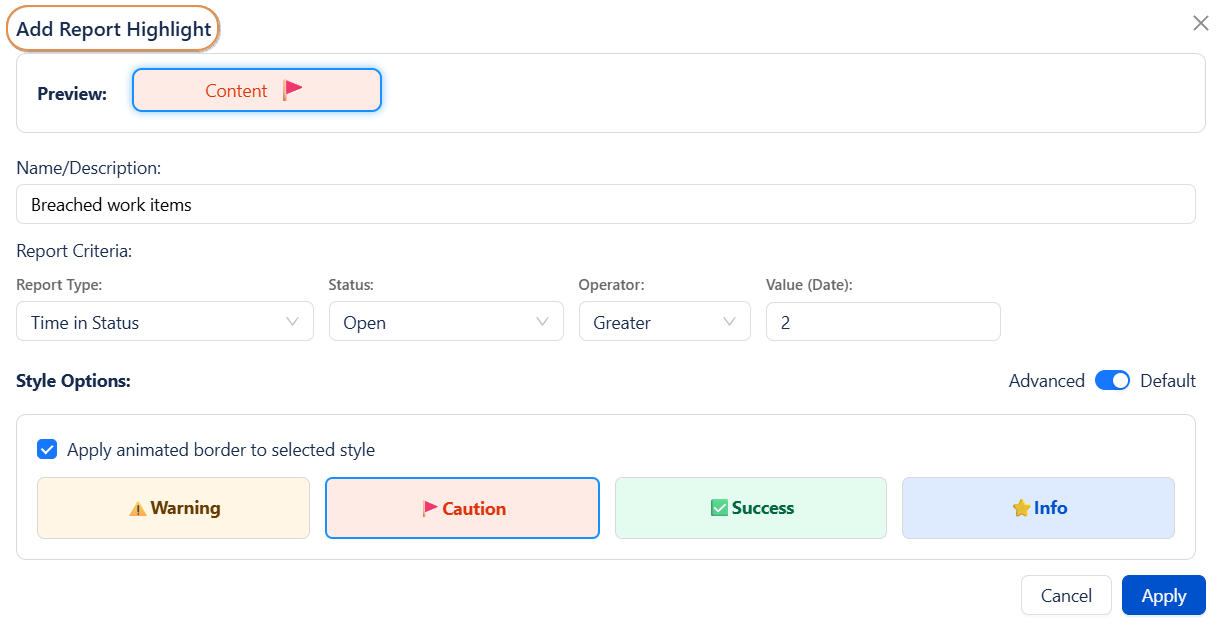
Configuration Settings – Report Highlights
When adding a new report highlight, you can customize the following:
-
Name / Description
-
Provide a clear title and short description to identify your highlight.
-
Example: “SLA Breached Work items – Support Team”
-
Report Criteria (Report Type)
-
Select the type of report to highlight. Options include:
-
Time in Status : Track how long Work items stay in each status
-
Assignee Time :Display the time spent from the Work items assigned to a user
-
Transition Count : Display the number of transitions for each status
-
Other types : Additional report types are also available
-
-
Style Options
-
Choose how your highlight will appear:
-
Default : Display the report in your chosen format
-
With this option, you can customize how the highlight appears, including:
-
Text color
-
Background color
-
Emojis applied to the highlight
-
Border
-
-
-
Advanced : These styles are already set up for you:
-
⚠️ At Risk : For highlights that need immediate attention
-
🚩 Critical : For highlights showing potential Work items or risks
-
✅ On Track : For highlights showing good performance or SLA compliance
-
⭐ Awareness : For highlights providing helpful insights or general updates
Simply pick the style that best matches the type of highlight you want to create.
-
-
Animation Note:
-
If Advanced is enabled and Apply animation bordder to selected style is applied, the highlight will display an animated border.
-
If animation is not applied, the highlight will keep the selected style but remain static.
-20250930-154159.png?cb=5006fcfcd02e9496d3a86cc83e7133ff)
Applying Highlights
Once you’ve finished configuring your highlight, it’s ready to go!
-
Click Apply to save your highlight.
-
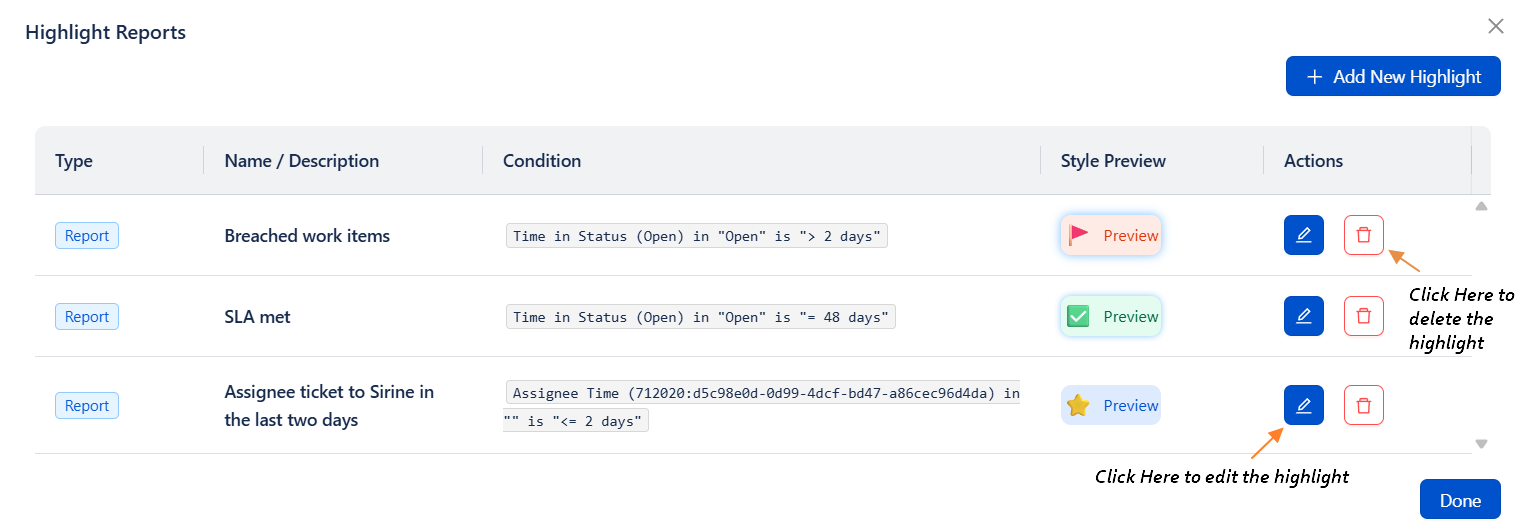
The new highlight will appear in your Highlights Section.
-
You can edit or remove highlights anytime:
-
Click the pencil icon ✏️ to edit a highlight
-
Click the remove icon 🗑️ to delete a highlight
-
View Highlight Details on Hover
-
To make it easier to understand why a Work item is highlighted, you can now hover over any highlighted row in the table to instantly view detailed information about that highlight.
When you hover, a quick info panel appears, showing key details such as:
-
ℹ️ Highlight : For example, For Your Awareness (if the “Advanced Option” is selected).
-
🧩 Issue: The issue key “TES-2569”.
-
👤 Status: The current status of the work item (eg ” Backlog”).
-
🖼️ Assignee: The avatar and name of the person assigned to the issue (e.g., Sirine).
-
💡 Insight: The specific condition or reason that triggered the highlight (“Time in Progress > 10 days”).
You’ll also find quick-action buttons directly inside the panel:
-
Open Issue: Instantly navigate to the selected issue in Jira.
-
View Timeline: Open the timeline view to explore detailed activity and transitions for this issue.
Highlight Visibility & Management Controls
-
The Highlight feature is now smarter and more flexible than ever.
-
You can control when, how, and where highlights appear globally or individually while keeping all your configurations safely saved.
Enable / Disable Highlights
-
Turn highlights ON or OFF without losing any settings.
Options:
-
Globally: Activate or pause all highlights at once.
-
Individually: Control each highlight separately by opening the highlight list and clicking the toggle on the left of the highlight.
When to use it:
-
Pause highlights during testing, presentations, or performance reviews.
-
Temporarily hide highlights that aren’t relevant but may be needed later.
How it works:
-
ON: Highlight is active and visible in reports.
-
OFF: Highlight is hidden, but all settings are saved for future use.
🪄 Tip: Disabling highlights reduces visual clutter, letting you focus on the metrics that matter most.
Always saved: All highlights remain stored even if you log out and return later, your highlights are ready to use.
Show Only Highlighted Work Items
-
Filter your table to display only Work items that match active highlights.
When to use it:
-
Quickly spot items needing attention (⚠️ SLA breached for example).
-
Focus discussions during stand-ups or retrospectives on critical cases only.
How it works:
-
ON: Table shows only highlighted items.
-
OFF: Table returns to the full list.
Example:
A “⚠️ SLA Breached” highlight instantly filters the table to show only SLA-violating items speeding up follow-ups and decision-making.
Organize Highlights by Report
-
Keep your workspace clean and highlights relevant to each report.
How it works:
-
Open any report (e.g Time in Status).
-
Click the Highlight tab to see only the highlights created for that report.
-
Add, edit, or remove highlights without affecting other highlights.
Why it matters:
-
Ensures each report shows only what’s relevant.
-
Makes highlight management simple, fast, and organized.
Why These Toggles Matter
Together, these options give you greater control and clarity over how highlights appear in your reports.
They help you focus on what matters most, reduce noise, and make team discussions more data-driven.
Best Practices
-
Use ✅ On Track to celebrate goals met (e.g SLA met).
-
Use ⚠️ At Risk or 🚩 Critical to show risks (e.g., SLA breached, pending approvals).
-
Keep some highlights in Default mode for neutral metrics to avoid visual overload.
Conclusion
-
The Report Highlight feature lets you easily draw attention to important reports without changing the overall dashboard layout. By choosing the right style for each highlight, teams can quickly spot urgent Work items.
-
Used well, highlights improve visibility, speed up decision-making, and ensure critical insights are never missed.
Need help?
🤝 We're here for you! If you have any questions, suggestions, or feature requests, feel free to reach out — we typically respond within 4 hours