
✨ No Need for Custom Fields
Managing Jira labels has never been easier , with Colored Label Manager, there's no need to create custom fields.
Everything you need is built right in for fast, flexible, and powerful label management.
Atlassian Expert good practices
Need help?
Features
Features of Colored Label Manager Specific Fields (Not Supported on Jira Native ‘Labels’ Field) :
-
Activate coloring for labels: Add visual distinction to labels with colors
-
Customize labels per project: Select "Customize labels for this project" to manage predefined labels independently for this project, separate from other projects.
-
Restrict label creation: As a project administrator, you can restrict the label field to prevent users from creating new label items. Users will be required to choose from existing ones, ensuring consistency across fields like Definition of Done (DoD), Definition of Ready, Acceptance Criteria, or simple select lists.
-
Independent label management: Allow project admins to manage available label items for their project without dependency on other projects or assistance from Jira administrators.
-
Generate powerful reports: Create fully customized reports without any coding or knowledge of Jira Query Language (JQL). Simply select options from dropdowns to build reports.
-
Add descriptions to labels: Provide clarity for your project users by adding descriptions to labels. Users can check if a label already exists before creating it, avoiding duplicates caused by spelling or case variations.
Create a Colored Label Field
As a Jira Administrator:
-
Access Apps:
Log in as a Jira Administrator and navigate to the Apps section in the Jira menu. -
Open Colored Label Manager:
Under the Apps section, select Colored Label Manager. -
Select Colored Label Fields:
Click on Colored Label Fields to manage your labels. -
Create a New Label Field:
Click on Create Label Field. -
Configure the Field Settings:
Set up your field by defining the name, description, and other necessary details, then click Create to save it.

You can create multiple label fields to cater to various needs, including:
-
Project Phases
-
Feature Areas
-
Team Responsibilities
-
Definition of Done (DoD)
-
Definition of Ready
-
Acceptance Criteria
-
Simple Select Lists
These customizable fields help organize and visually categorize your work more efficiently!
In Service Management projects, label fields are automatically added to your screens. However, for Software projects, you will need to manually add the label fields to the relevant screens.
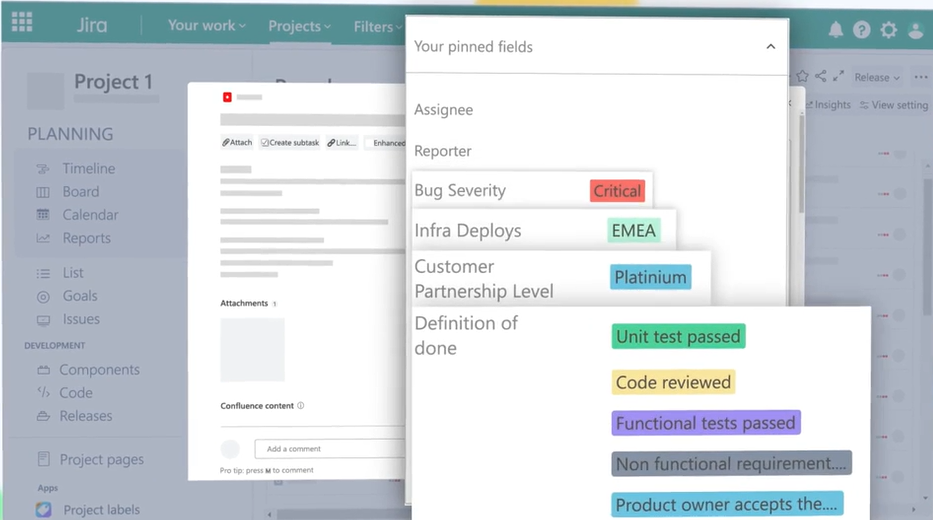
Create a New Label Item
-
On this page, you can easily create a new label item for your chosen label field. Simply assign a name, description, and color to the label, then click Add Label.
-
You can choose to add the label to one or more issues immediately, or create it and allow Jira users to use it later.
🔑 Tip: Ensure you're creating label items under the correct label field ( Definition of Done, Acceptance Criteria, or Others ) to keep things organized!
-20250505-162356.png?cb=9a2724120da1b4f4354849ad0527236a)
Selecting Label Color Settings
-
Just like other settings, you can select the project-specific "Label Color Settings" on the project administration page.
-
Newly created labels have the default color light grey.
-
A label-specific color means that, just like Epics, a label will have a predefined color.
-
Colors can indicate labels with higher priority or represent any meaning you define within your Jira instance.
-
You can always change a label’s color—simply select the color you want for the label. More colors will likely be added in the future.
-
Already assigned labels on issues will have their color updated based on your selection.

Checking Label Use in Your Project
-
Go to your project, open Project Labels from the sidebar, and you’ll see something like this:
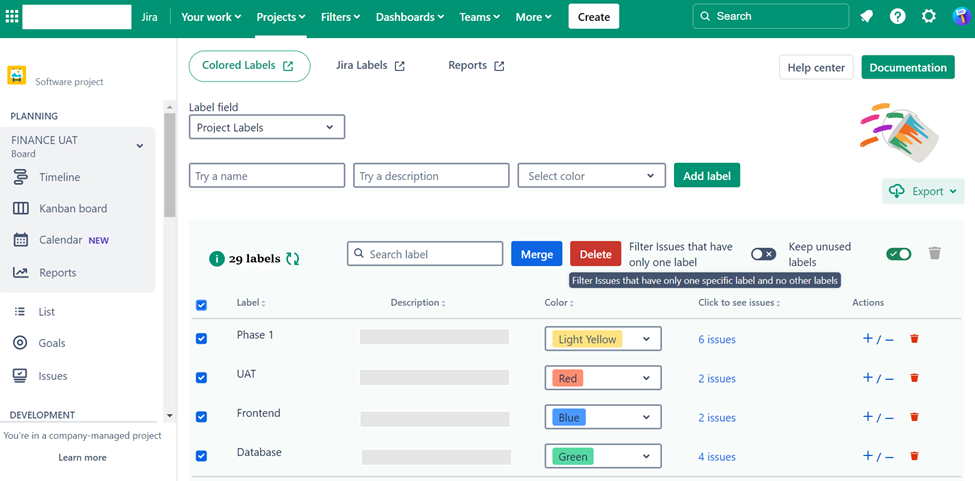
This is a list of all the colored Jira labels in your project.
-
The description field is optional—use it to add context for your team and make your label field more clear .
-
The "Click to see issues" column shows how many time a label has been used. Click the link to open a filtered view of all issues with that label in a new tab.
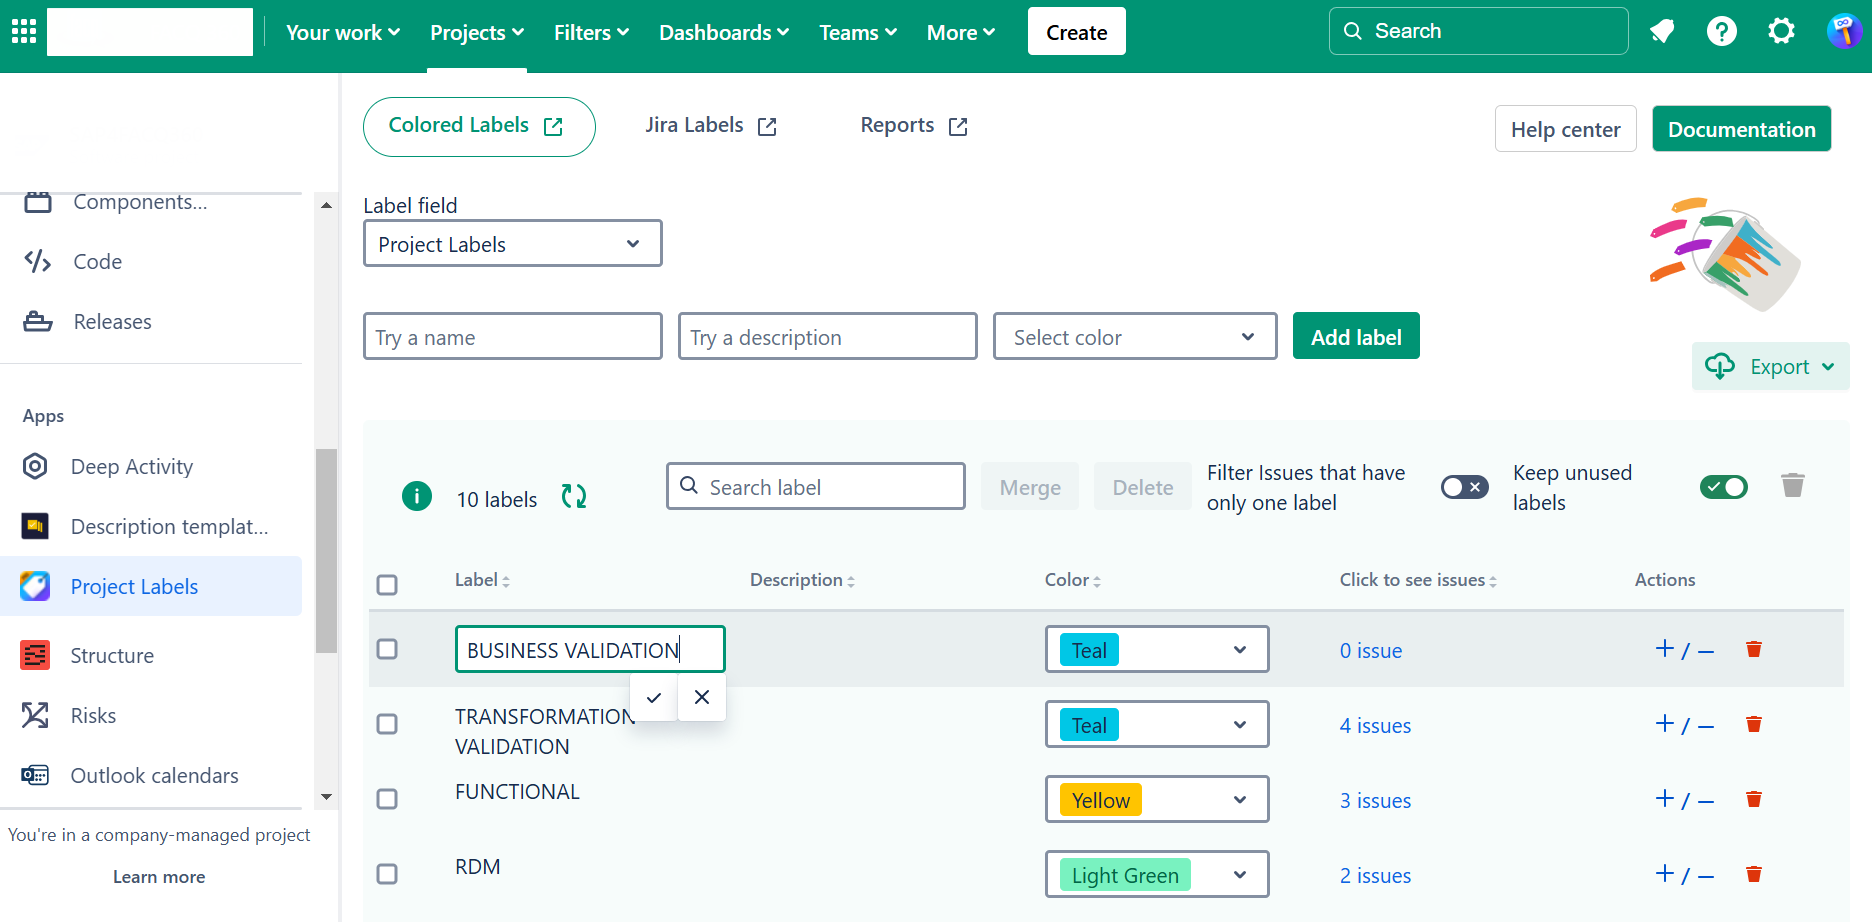
Renaming a Jira Label
📝 Rename Labels Easily: With Colored Label Manager, renaming labels is simple! Just click on the label you want to rename, make the change, and it will be updated across all issues using that label.
Steps to Rename Labels:
-
Go to your project.
-
Open Project Labels from the sidebar.
-
Click on the label you want to rename and make the changes.
-
Check to apply the changes! ✔️
⚠️ Important Note: When in global mode, any administrative actions (like renaming, deleting, etc.) will apply across all projects. If you prefer to manage labels only within specific projects, switch to per-project label management.
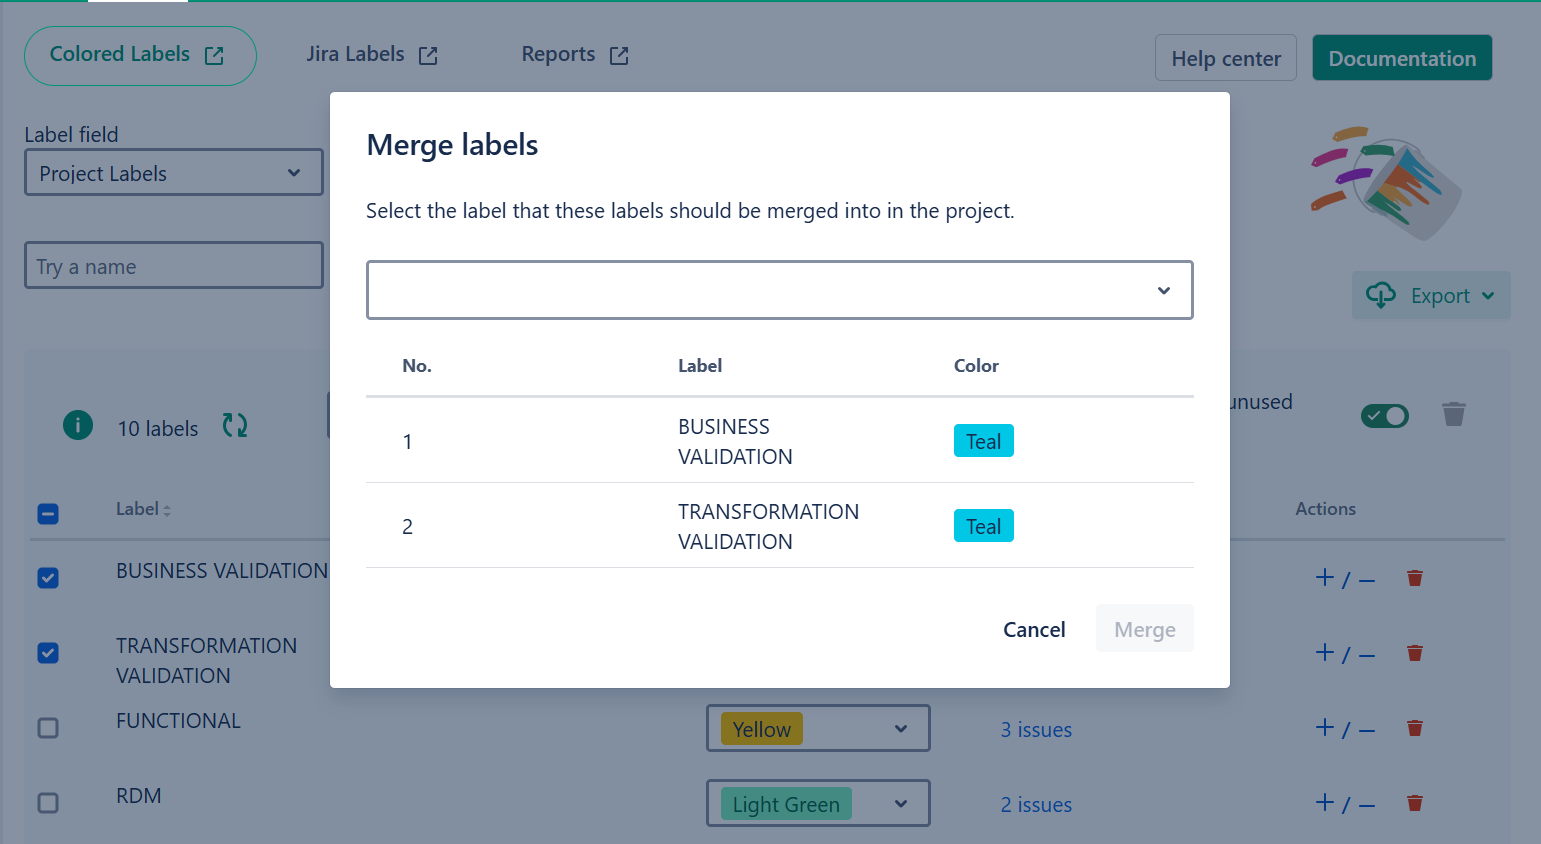
Merging Jira Labels
-
If you have duplicate labels (due to spelling or case differences), you can easily merge them. Here's how:
-
Select the labels you want to combine.
-
Click Merge.
-
Choose the correct label to keep.
This helps maintain consistency and clean up unnecessary duplicates!

Deleting a Jira Label
-
You can safely delete labels that are no longer needed or are unused across your issues.
To delete a label:
-
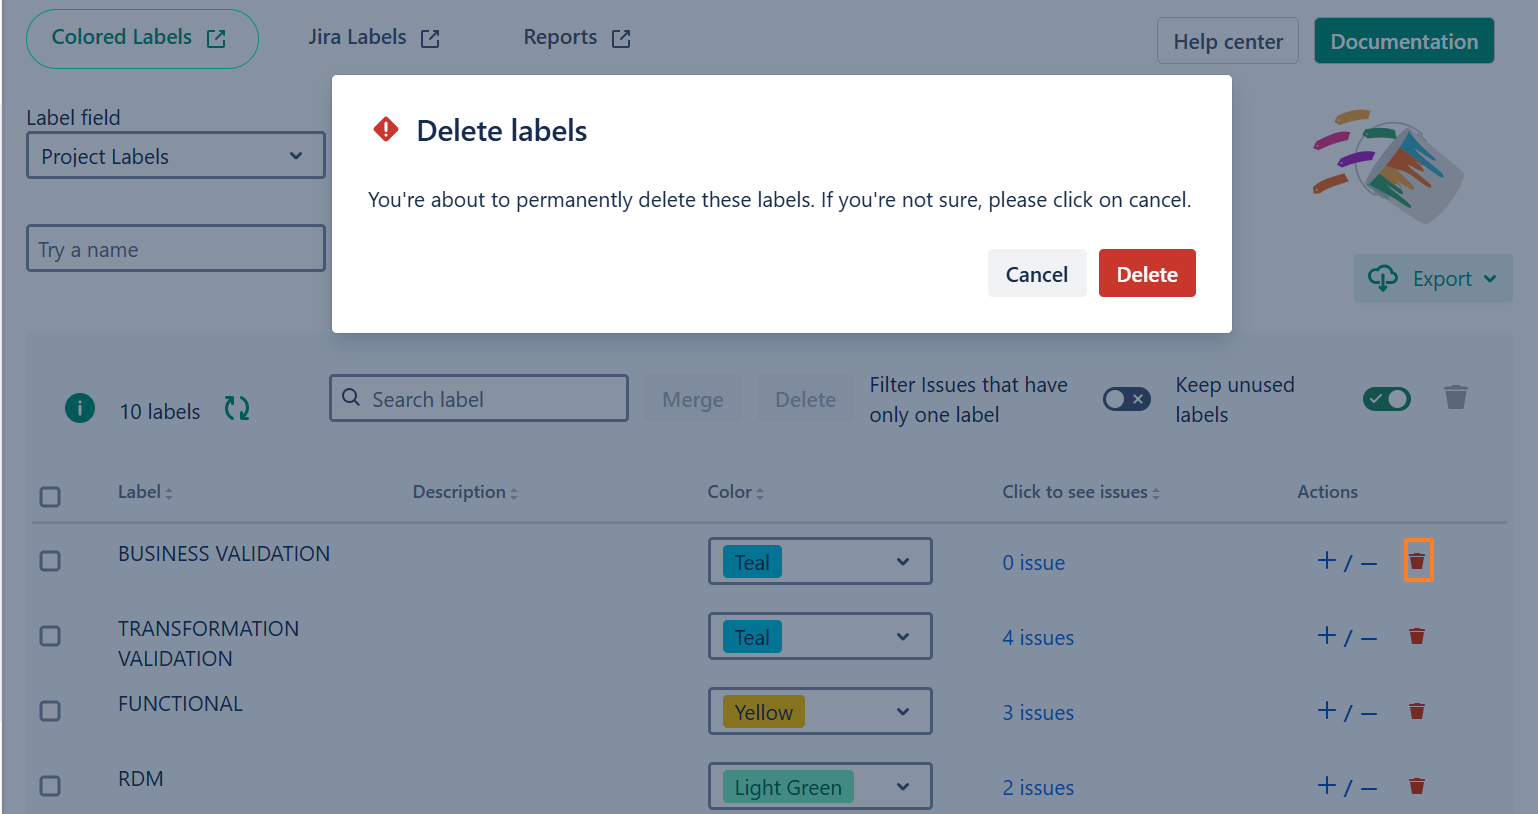
Click the red trashcan icon next to the label you want to remove.
-
A pop-up will appear—confirm by clicking Delete. 🗑️
This action will permanently remove the label from your project.
-
Once a label is deleted, it will no longer appear as a suggestion when adding labels—unless it is still in use in another project.
Make sure to check for its usage across your projects before deleting to avoid leaving any inconsistencies.
In some cases, deleted labels may still appear in the label field. For a workaround, refer to Known Issues & limitations
Bulk Delete or add Jira Labels to issues
-
To bulk add or remove labels from issues:
-
Click on the + or - icon next to the label field.
-
Select the labels you want to add or remove.
-
Apply changes to multiple issues at once for efficient label management.
-

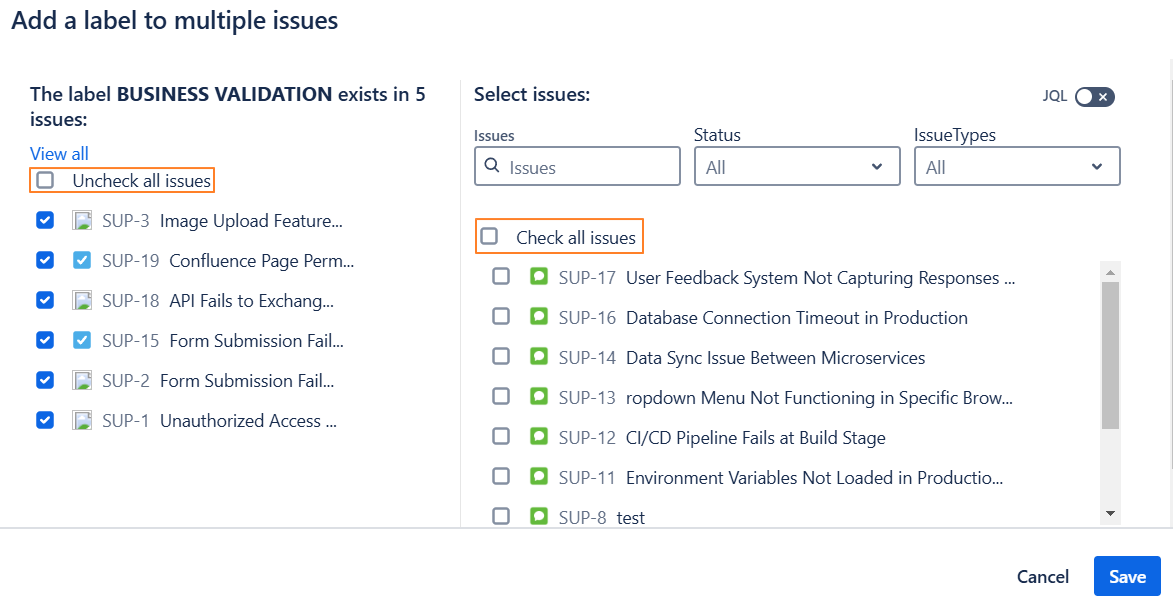
To manage the label field across issues:
-
Bulk Remove: Uncheck "All Issues" to remove the label from every issue.
-
Specific Removal: Uncheck the box next to the specific issues you want to remove the label from.
-
Bulk Add: Check "All Issues" to add the label to every issue.
-
Specific Addition: Check the box next to the specific issues you want to add the label to.
Atlassian Expert good practices
-
Avoid using abbreviations unless they are widely understood and accepted by your team. This will help prevent the use of synonyms.
-
Always add a description to your label to make its context and usage clearer for your team.
-
Always check whether a label already exists before creating a new one; remember that differences in spelling or case variations might be the reason you don’t find it.
-
You can also click on "Click to see issues" to jump to the issue navigator and view a list of all issues with the label.
Need help?
💡 We're here for you! If you have questions or need to report a bug, visit our Help Center and raise a support ticket. Our team is ready to assist you!