
Make your workflow faster and more efficient by saving your custom views! Whether you've applied filters, changed table layouts, or added highlights you can save, reuse, and manage your configurations anytime.
Here’s how to make the most of Saved Views in Deep Activity 👇
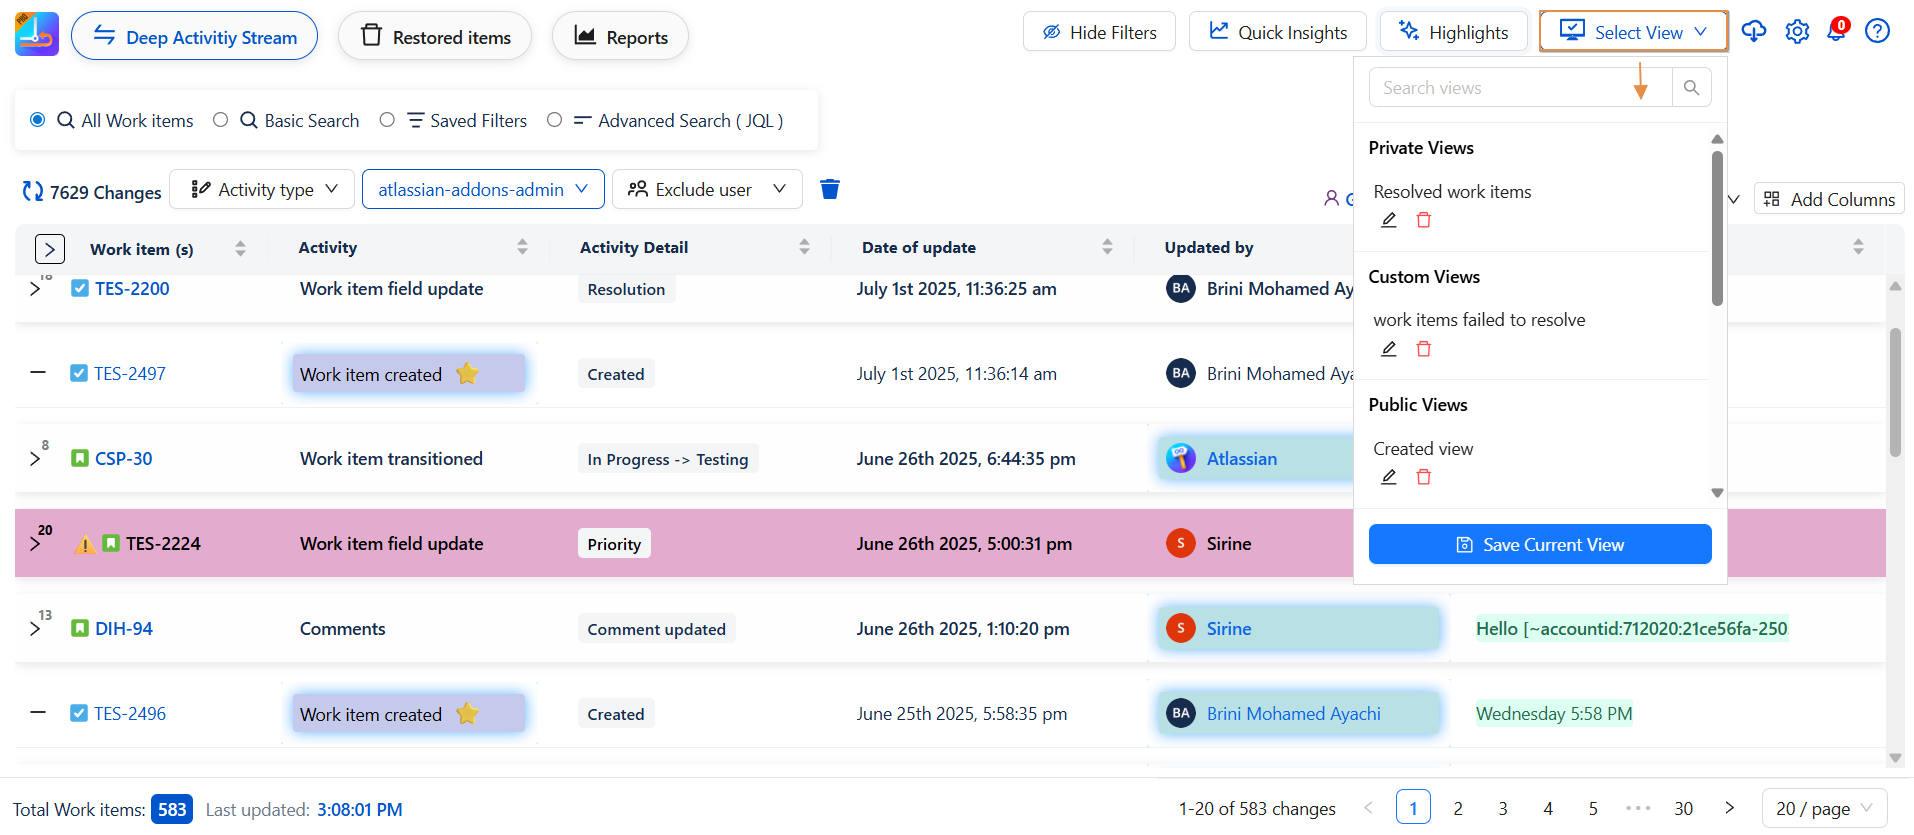
Save View
Once you've customized your table and applied filters or highlights, you can save the view for later use:
-
Click on Select View > Save View
-
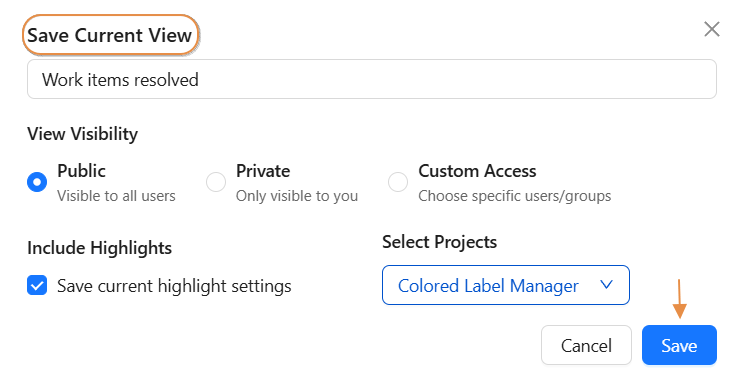
In the Save View dialog, choose options:
-
Save Current View
-
Include Highlights (optional)
-
-
Define View Visibility:
-
🔓 Public – Visible to all users
-
🔐 Private – Only visible to you
-
👥 Custom Access – Share with selected users or groups
-
-
Select Project if needed
-
Click Save
This makes it easy to return to personalized views without redoing your configuration.
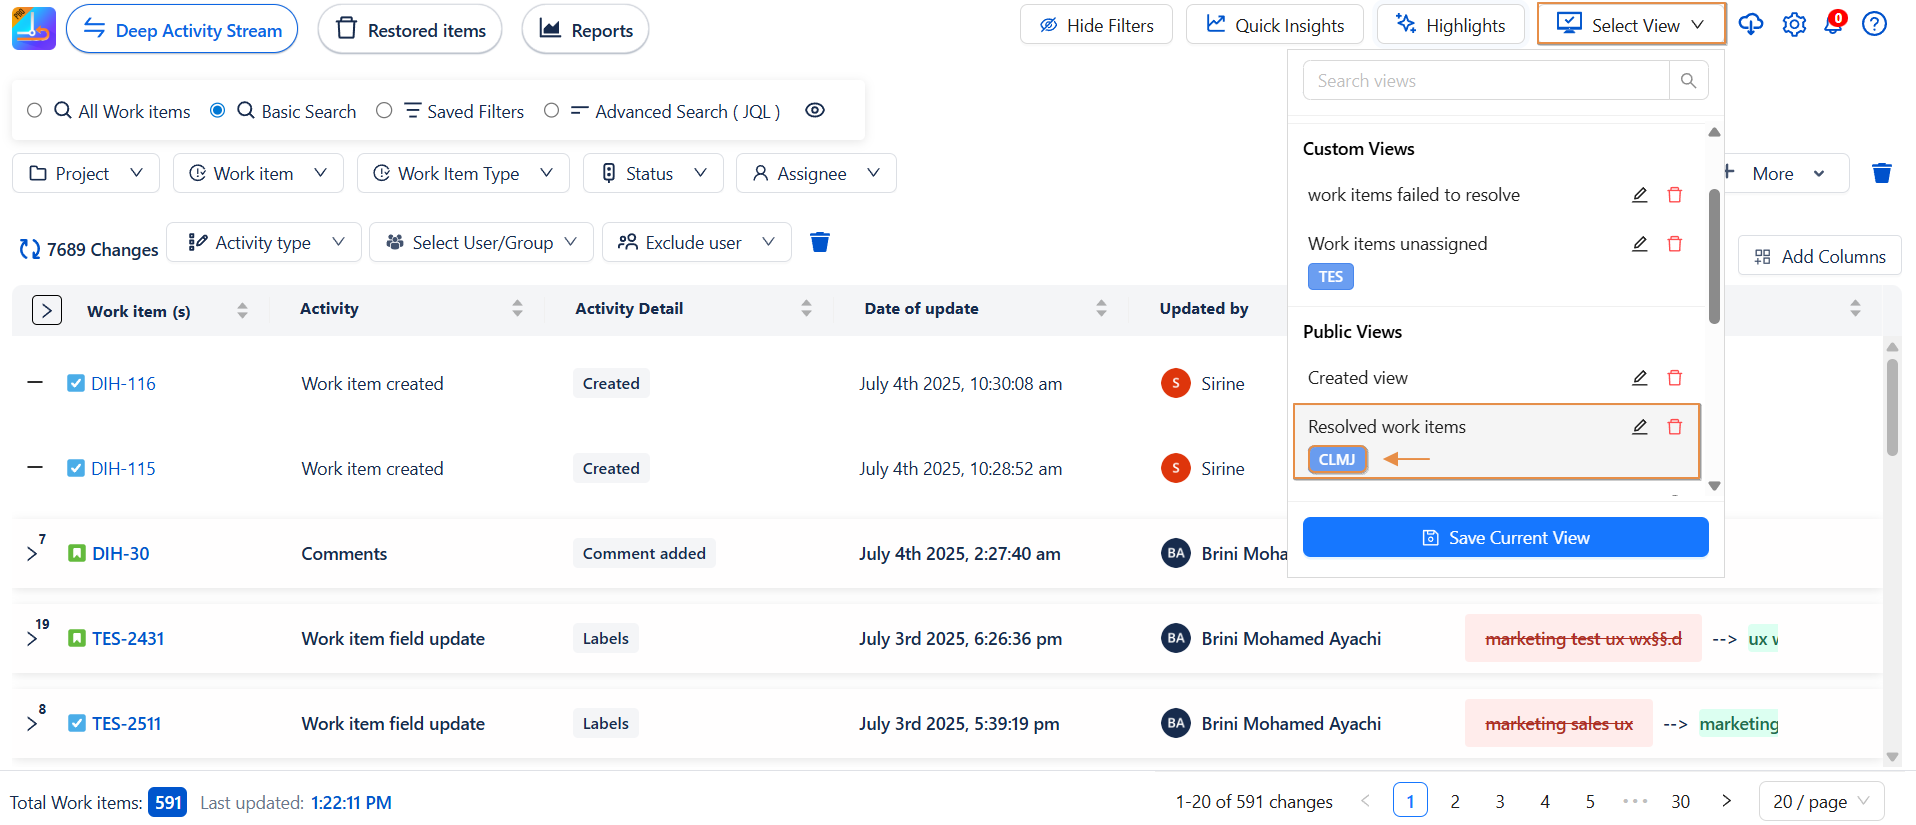
Saved Views – Project Context Visibility
When a view is saved and associated with a specific project, it automatically becomes available in the Global Saved Views list.
To enhance clarity and context:
-
Each saved view displays the project key directly beneath its name.
-
This allows users to quickly identify which project the view belongs to, especially when managing multiple saved configurations across different projects.
This design ensures a more intuitive navigation experience and helps prevent confusion when working with similar view names in a global context.
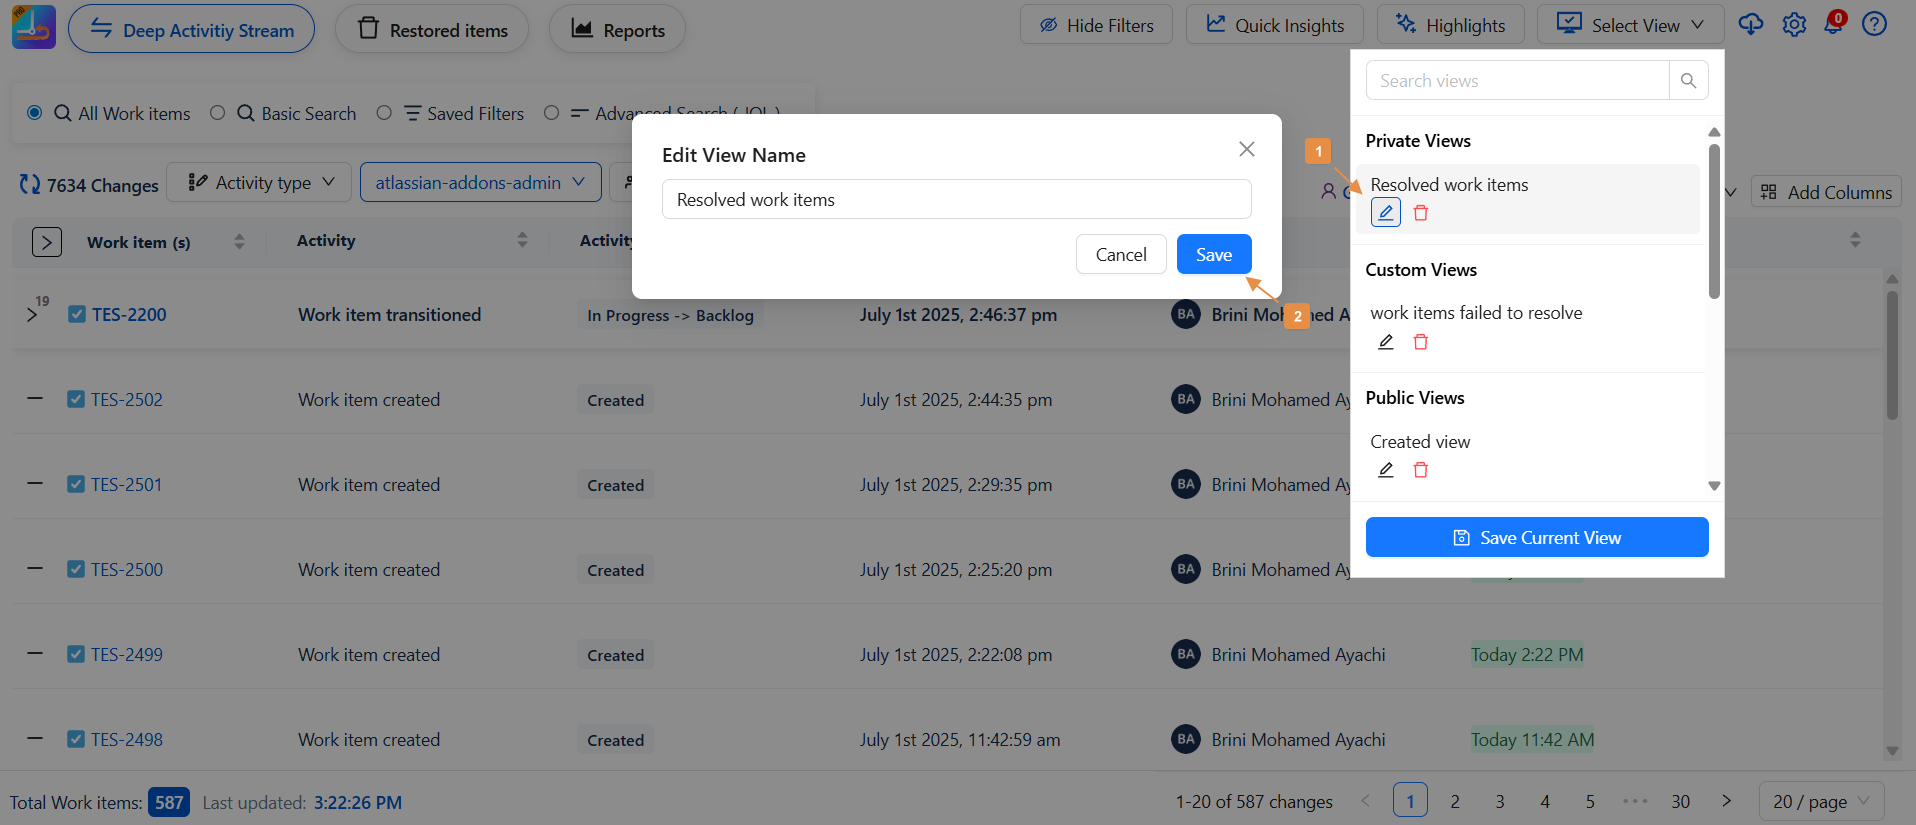
How to Edit a Saved View – Step by Step:
-
Click on the pencil icon next to the view name.
-
A popup window will appear showing the current name.
-
Edit the name directly in the input field.
-
Once done, click the "Save" button to apply the changes.
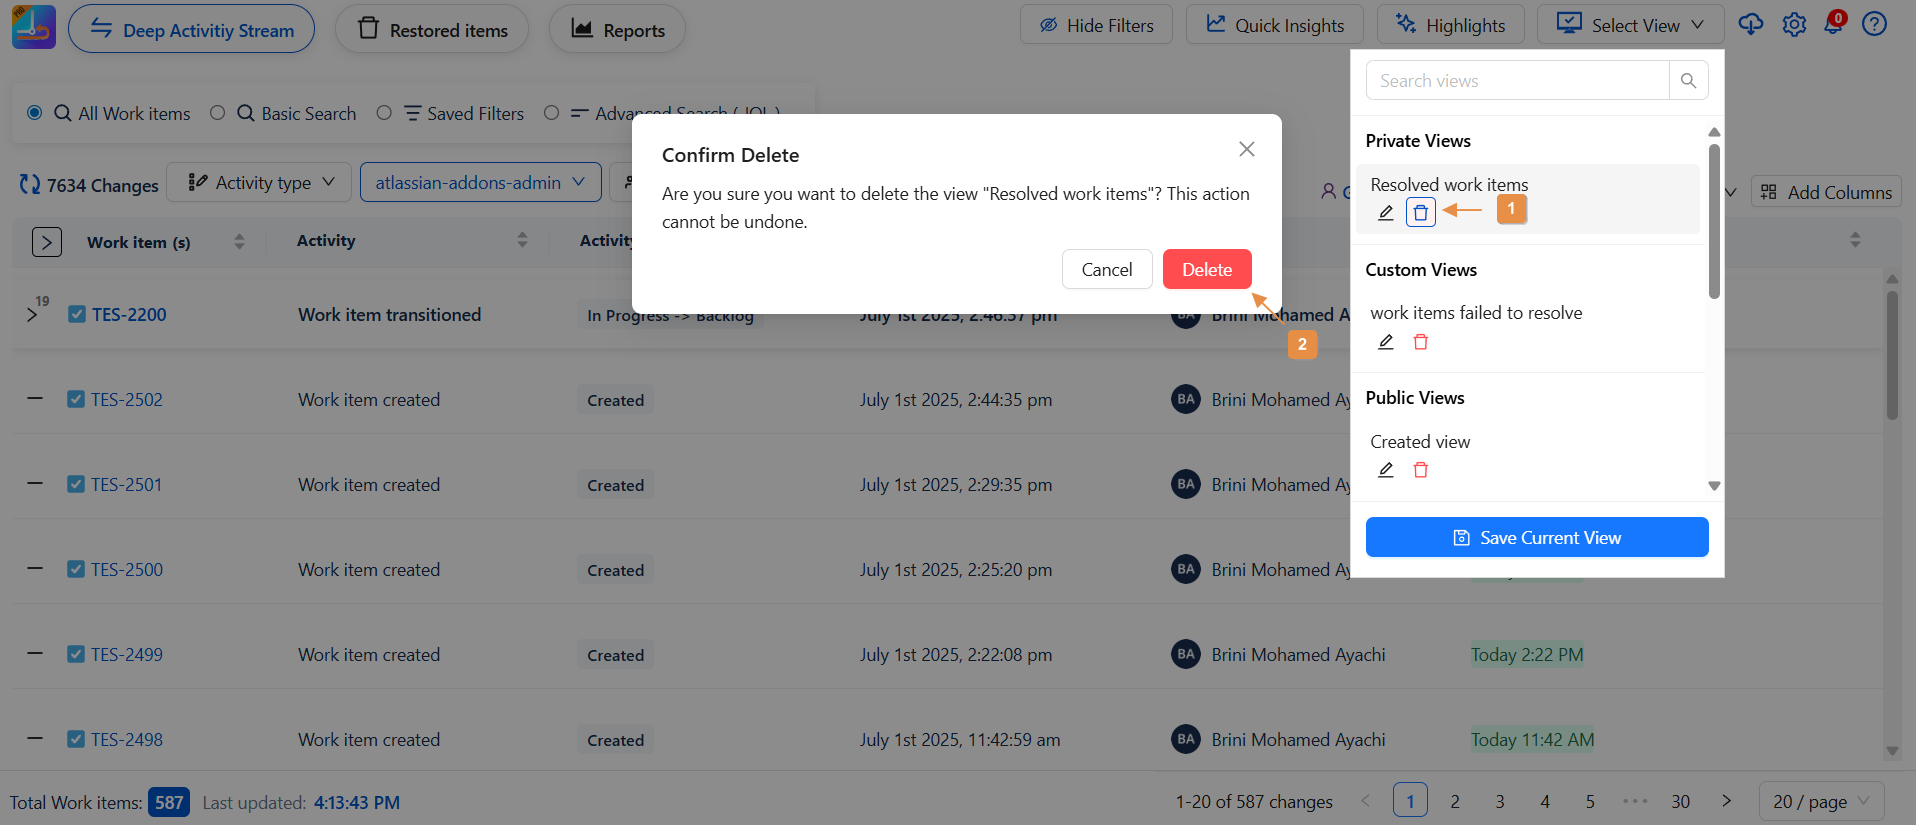
How to Delete a Saved View – Step by Step:
-
Click on the icon of delete next to the view name.
-
A popup window will appear to comfirm the deletion.
-
Click delete
How to Clear a Selected View – Step by Step:
-
Click on a view to load it. The screen will display the saved filters and settings.
-
To return to a clean/default view:
-
Click on "View" again.
-
Then click "Clear Current View".
-
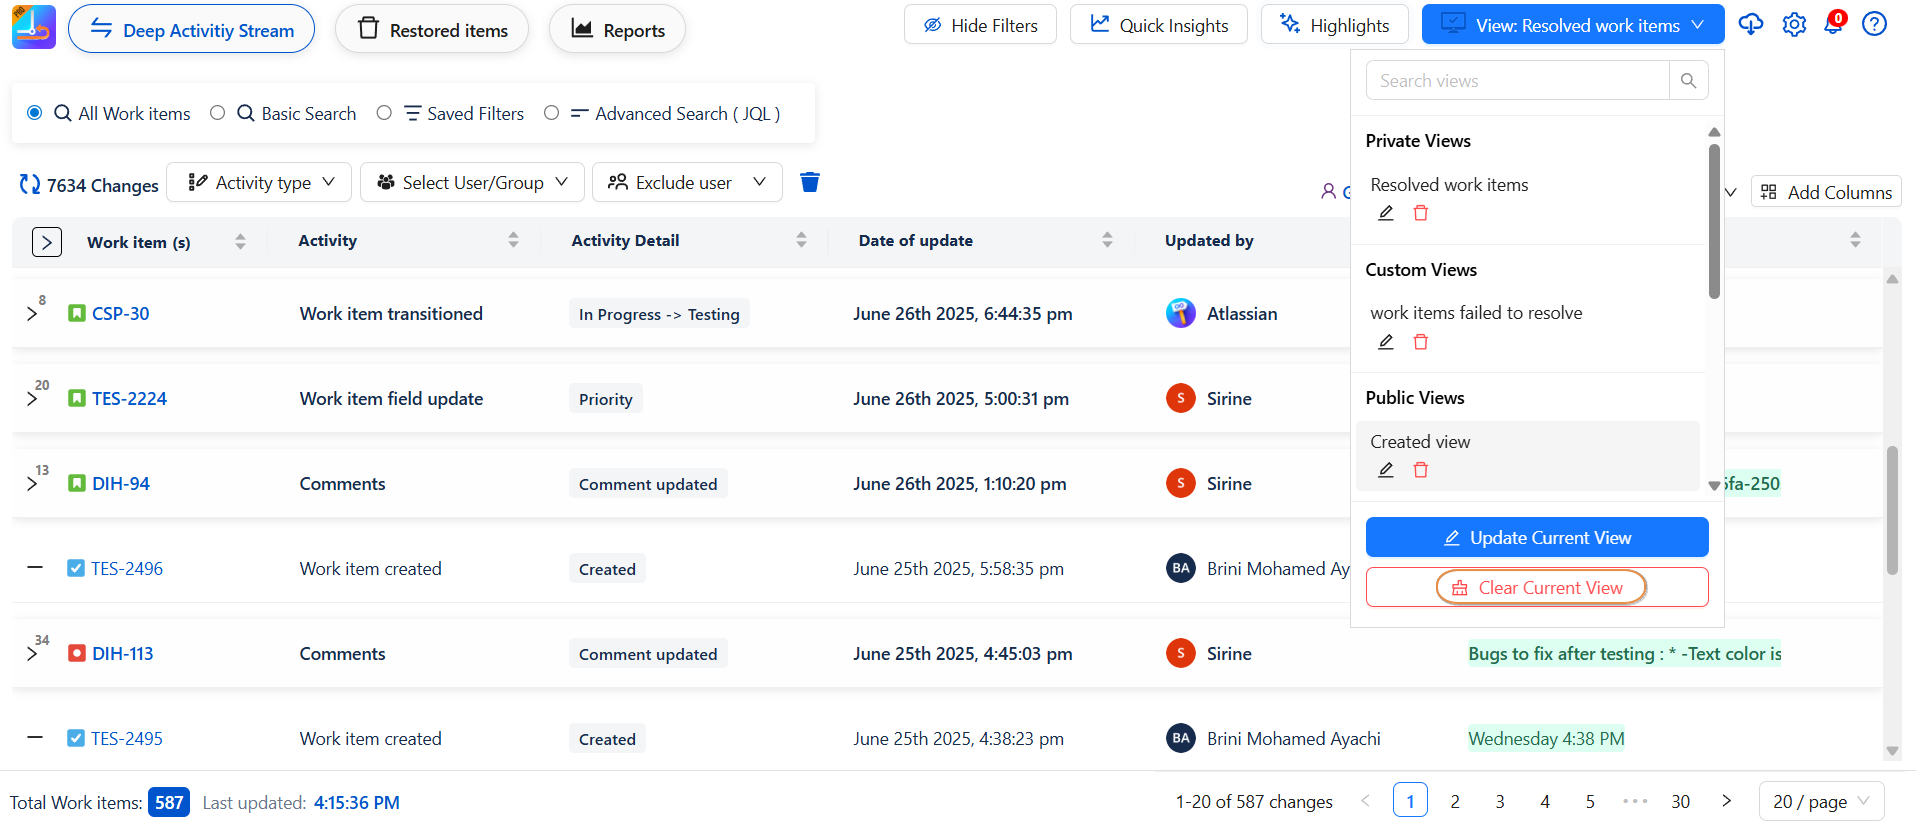
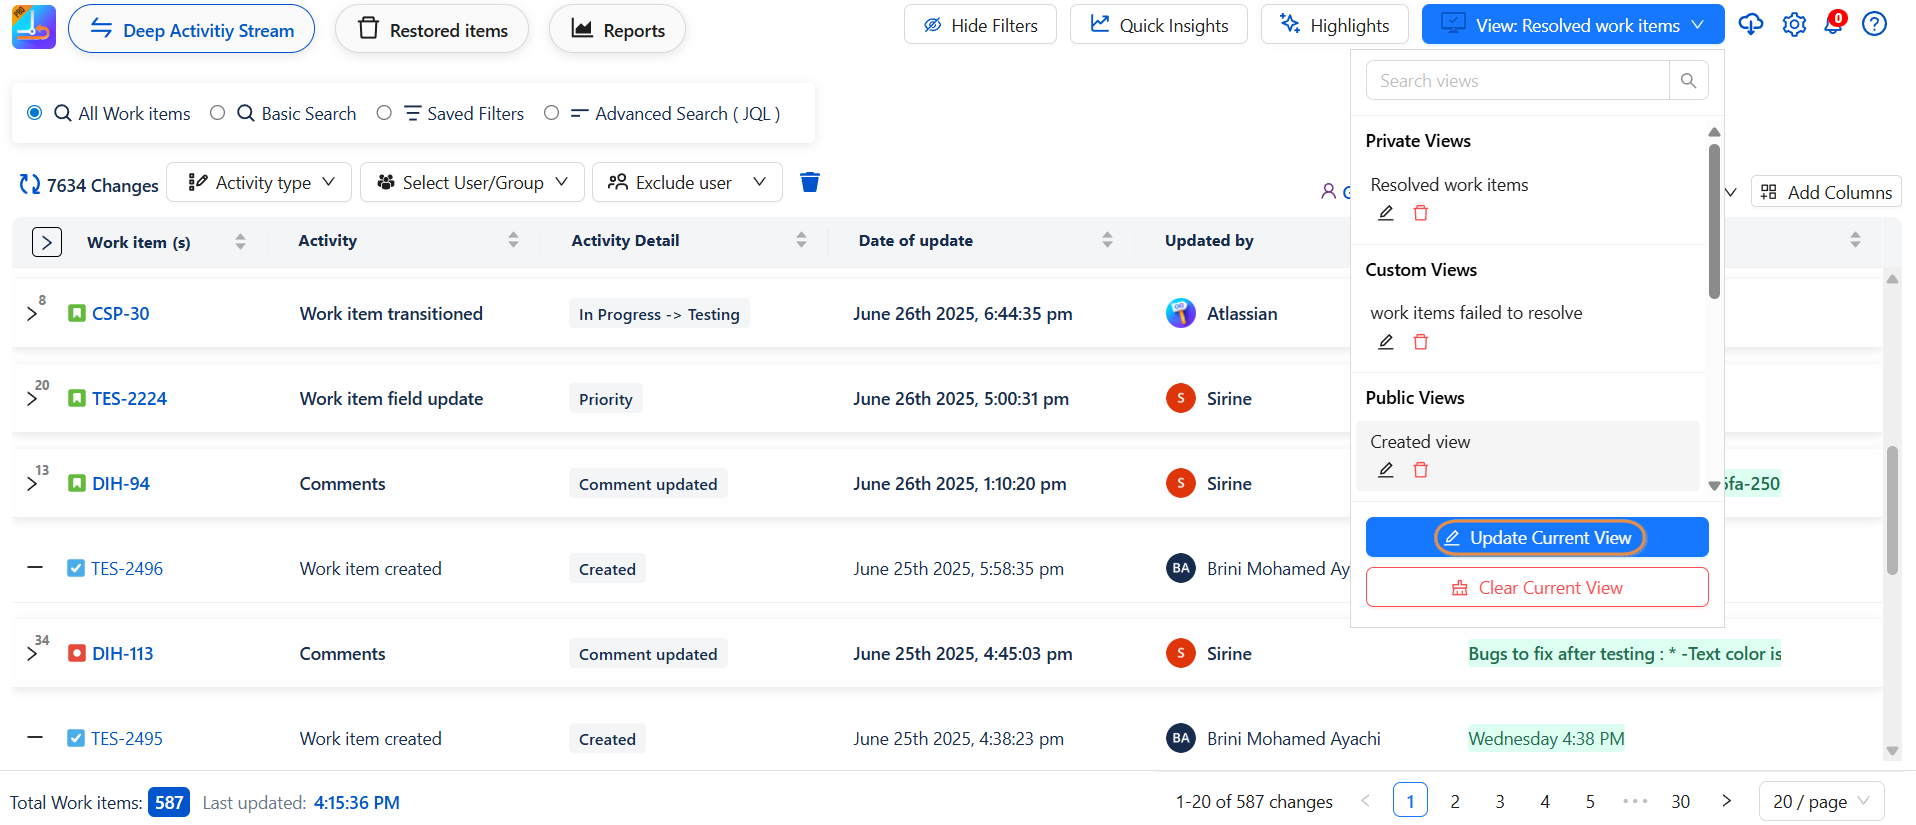
How to Update a Selected View – Step by Step:
-
To update a selected view, click on "Update Current View".
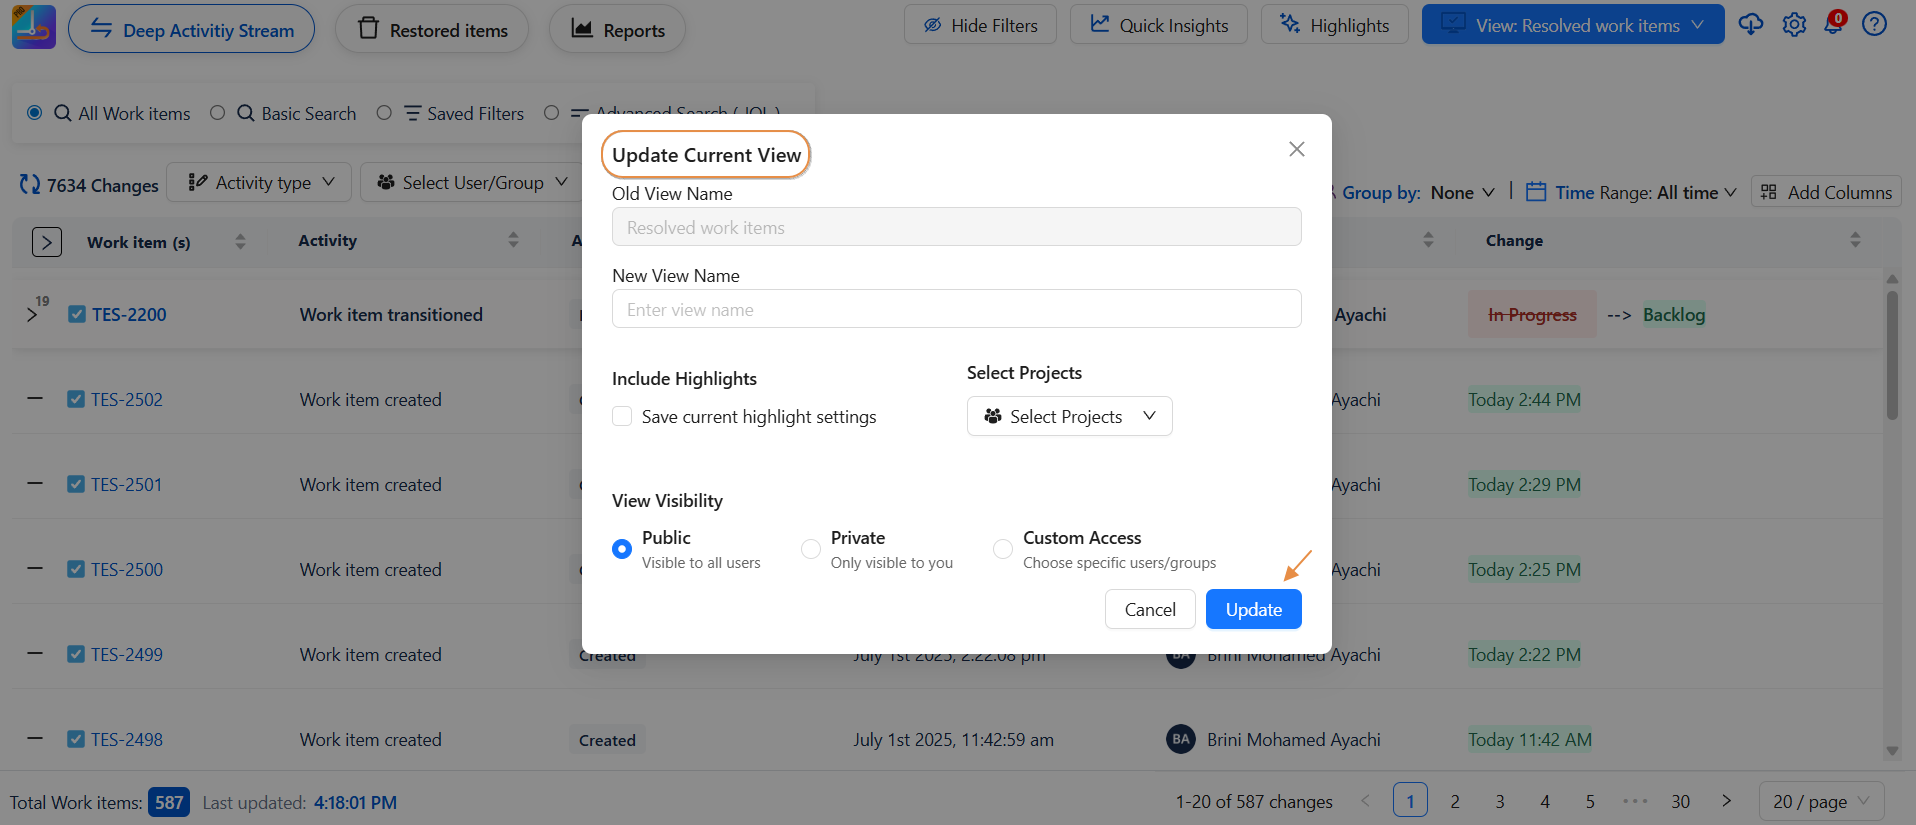
-
A pop-up window will appear showing the name of the view, along with options to adjust highlights and visibility settings.
-
Make the necessary changes, then click "Update" to save your modifications. The selected view will now reflect the updated configuration.
How to Hide and Show Views
Want to declutter your view list?
Now you can easily hide views you don’t use often whether they were created by others:
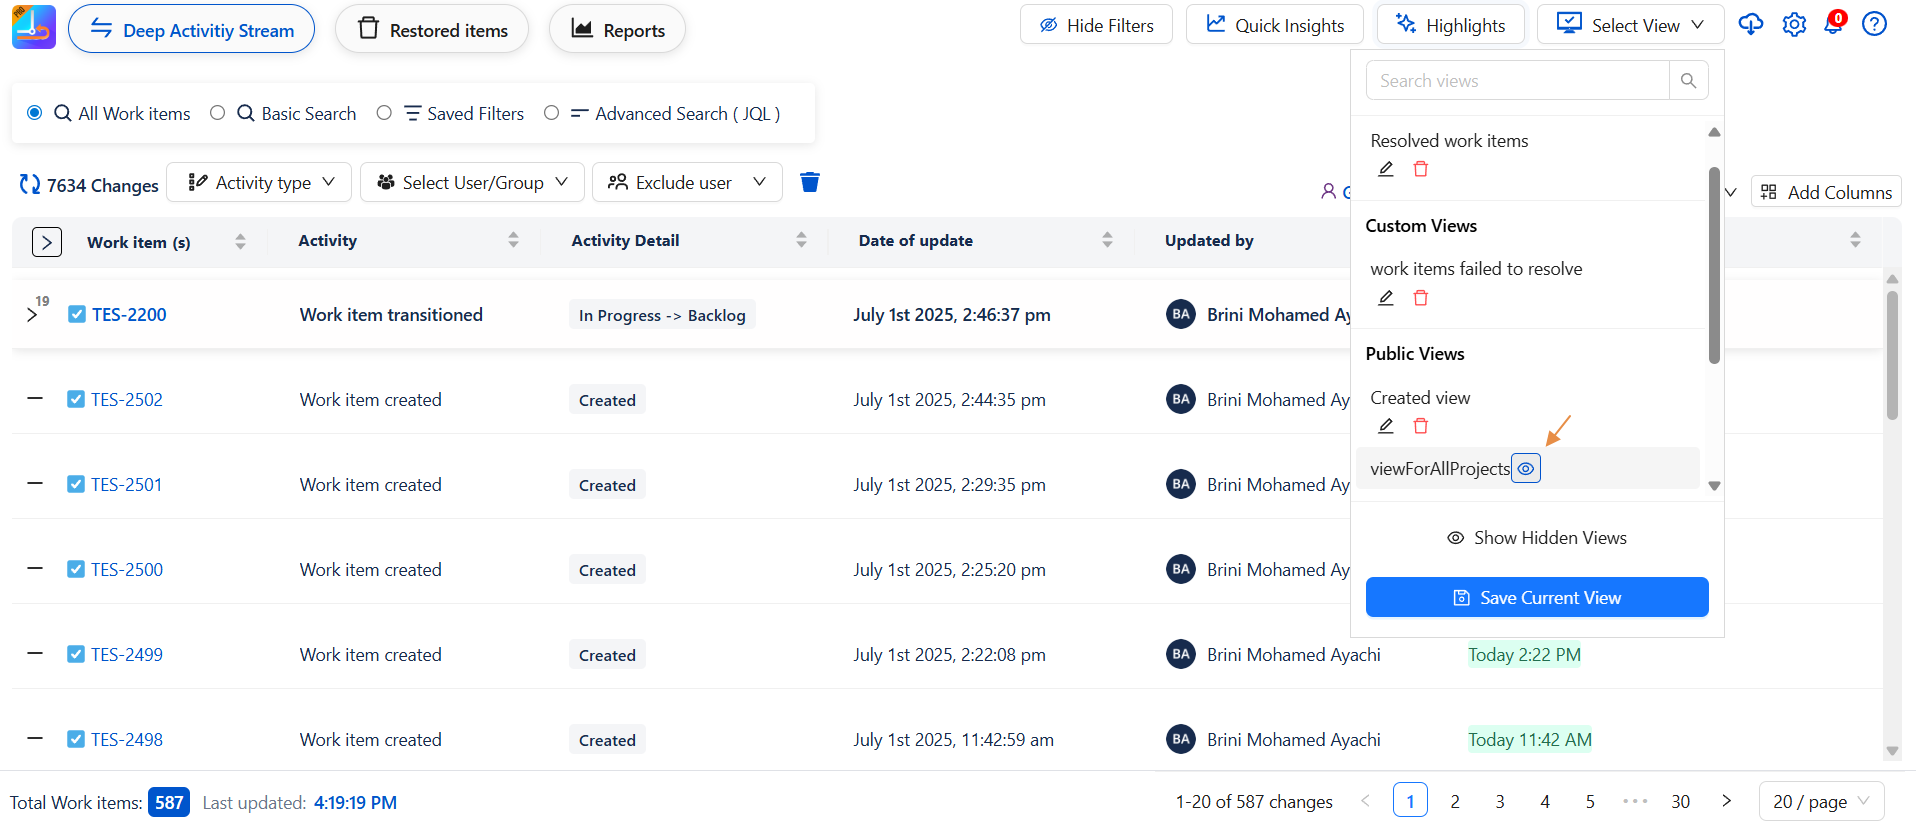
✅ How to Hide a View
-
Next to each saved view (yours or shared with you), you’ll see an eye icon (👁️).
-
Click the eye icon to hide that view from your list.
-
The icon will become inactive (greyed out), indicating the view is hidden.
Show or Hide All Hidden Views
-
Once at least one view is hidden, a “Hide Hidden Views” button will appear.
-
Click it to completely remove hidden views from the visible list.

-
-
To bring them back, click the “Show Hidden Views” button.
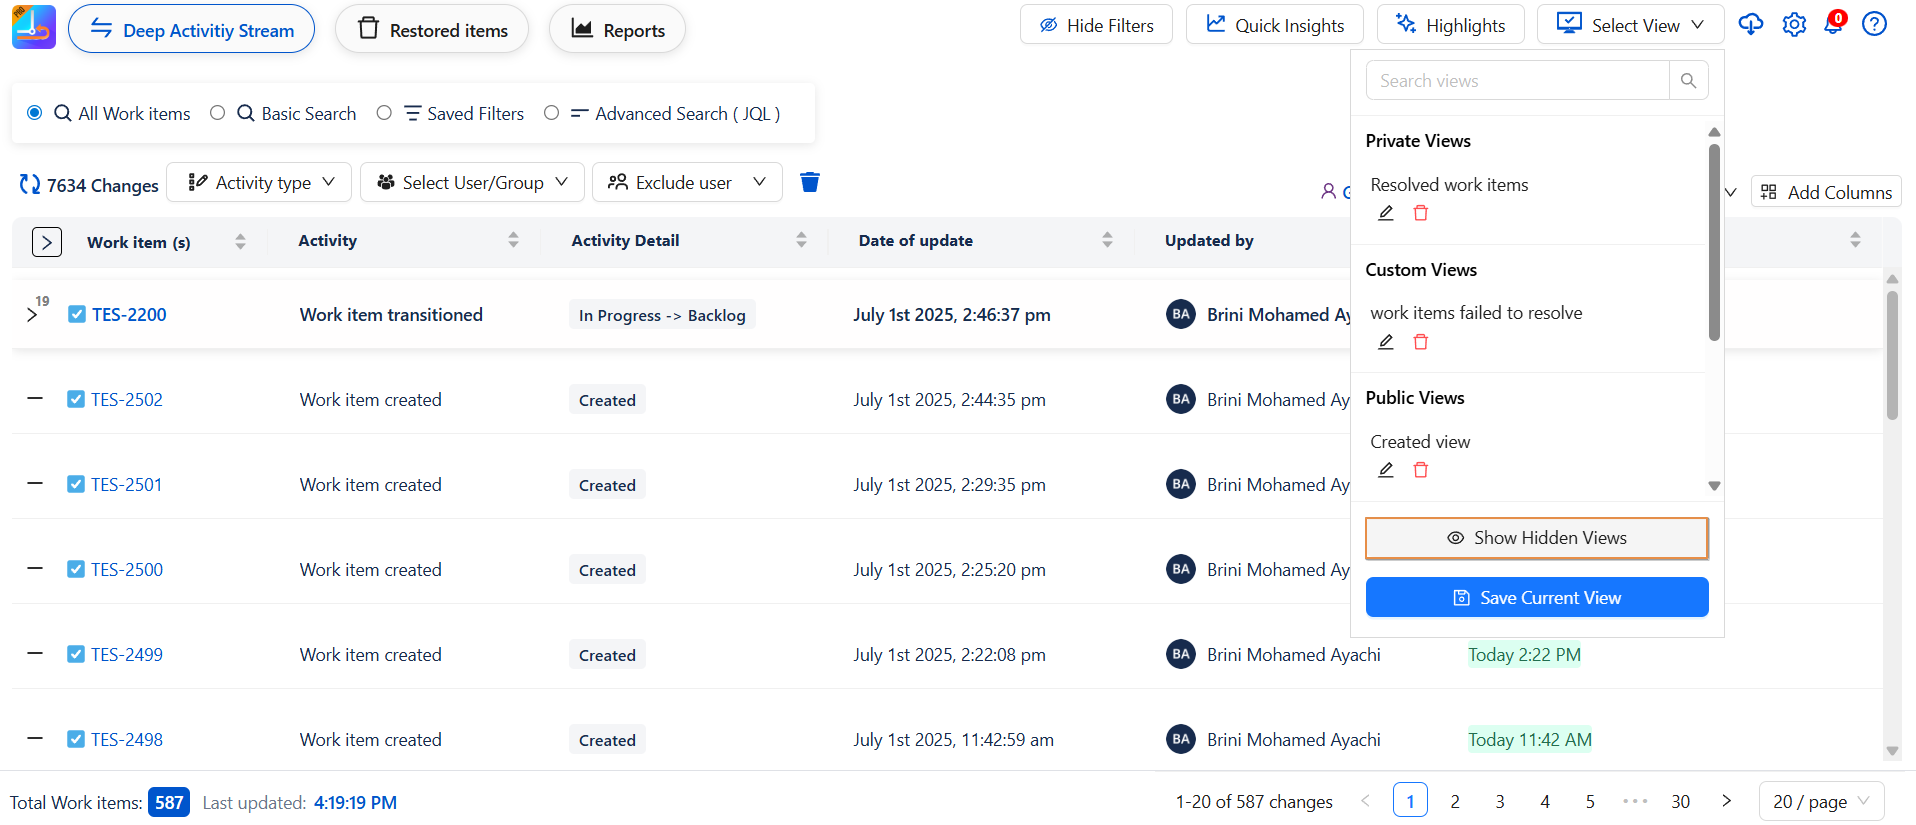
🔄 Re-show Individual Views
-
If “Show Hidden Views” is active, the hidden views (even those created by others) will be displayed with inactive eye icons.
-
To unhide a view, simply click the eye icon again.
-
Once no views are hidden, the Hide/Show Hidden Views buttons disappear automatically.
Need help?
🤝 We're here for you! If you have any questions, suggestions, or feature requests, feel free to reach out — we typically respond within 4 hours.