
Colored Label Manager for Jira empowers users to:
-
Create, manage, and control labels globally or at the project level.
-
Generate powerful reports based on label usage for better insights.
-
Manage existing Jira Labels fields or create new custom colored label fields tailored to your needs.
🆕🔥 Perfect Dashboard Gadget Replacement – New! Outperforms Atlassian’s sunsetted Labels Gadget with advanced filters, custom label fields, and instant updates.
✨ Check out this video to discover how the Colored Label Manager plugin can level up your Jira experience! 🎬
-
Create a Colored Label Field -
Restrict new labels creation -
Generate Label Reports -
Labels Gadget on Jira dashboard -
Supercharge Your Jira Workflow with Colored Label Manager! -
Automate the label management process -
Top 10 Use Cases For Labels In Jira + Tips -
11 Best Practices to Use Jira Labels for Effective Project Management + FAQ -
Known Issues & limitations
Installing Colored Label Manger for Jira
Option 1: Installation from within Jira
-
The app is built on Forge, which means it is hosted by Atlassian itself. No data leaves your instance, ensuring complete security and compliance.
-
Log into your Jira instance as an admin.
-
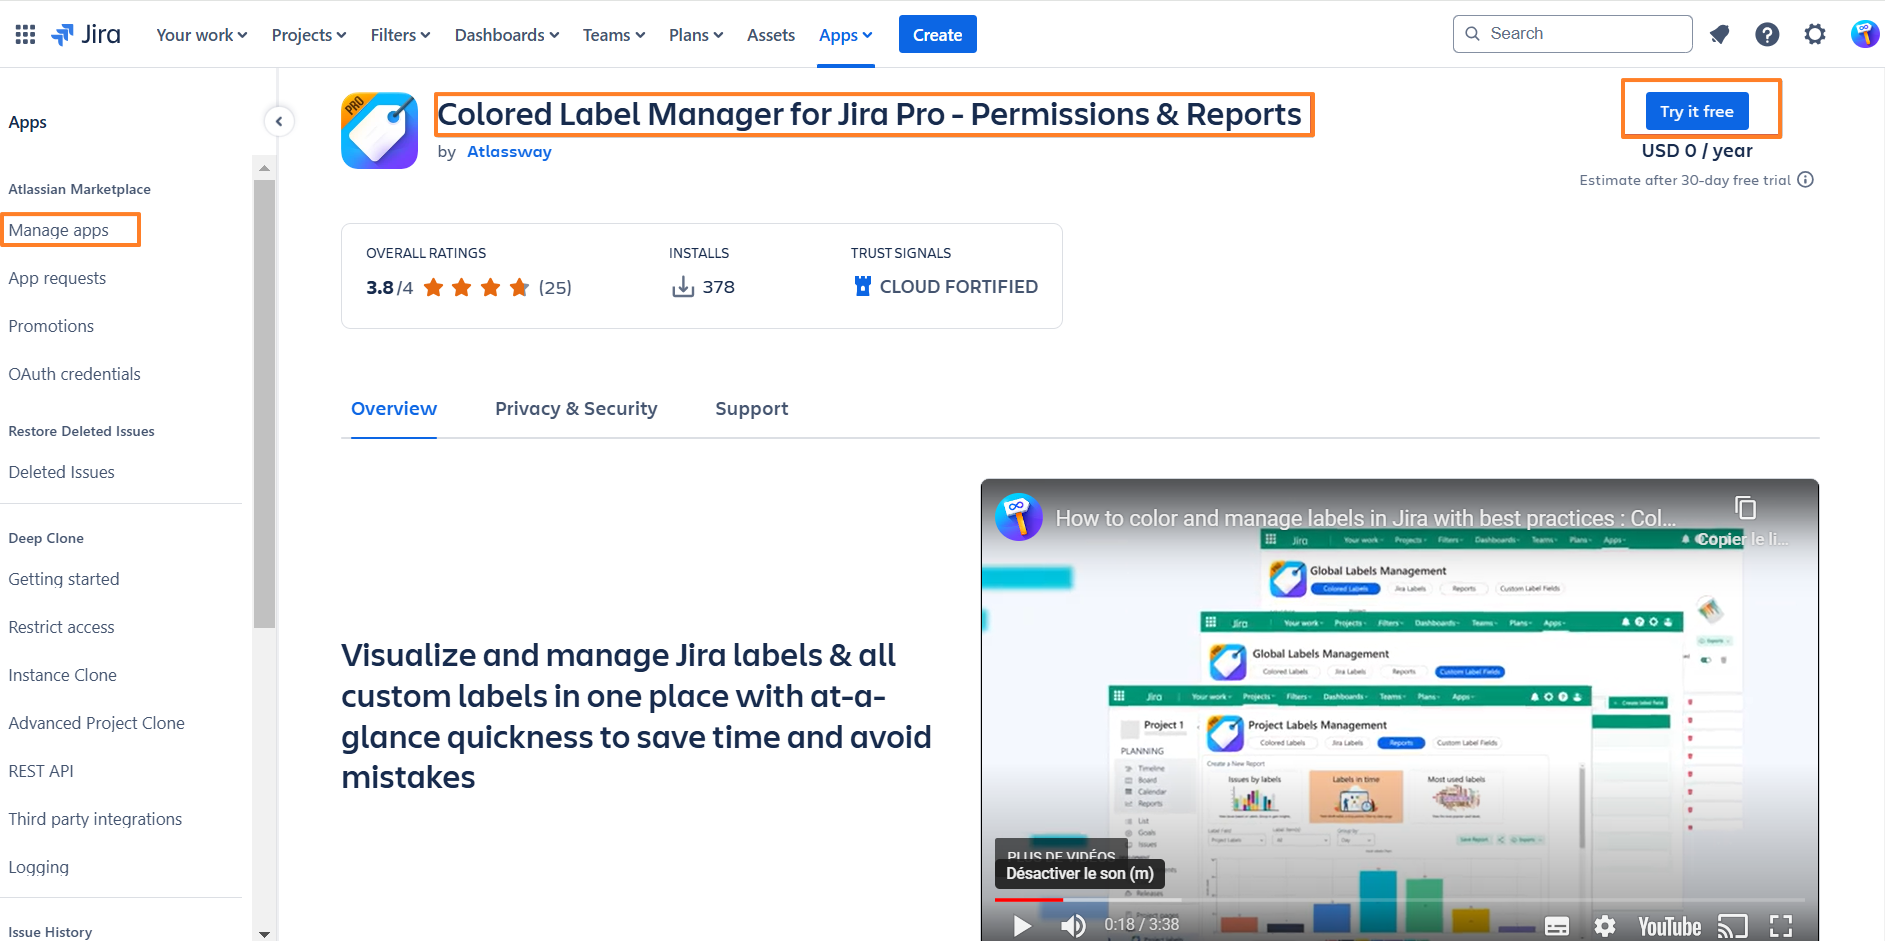
Go to Settings → Apps → Manage Apps → Find New Apps.
-
Locate Colored Label Manager for Jira.
-
Click Try it Free to download and install the app.
-
Once installed, click Close in the "Installed and Ready to Go" dialog.
-
Option 2: Installation from the marketplace
-
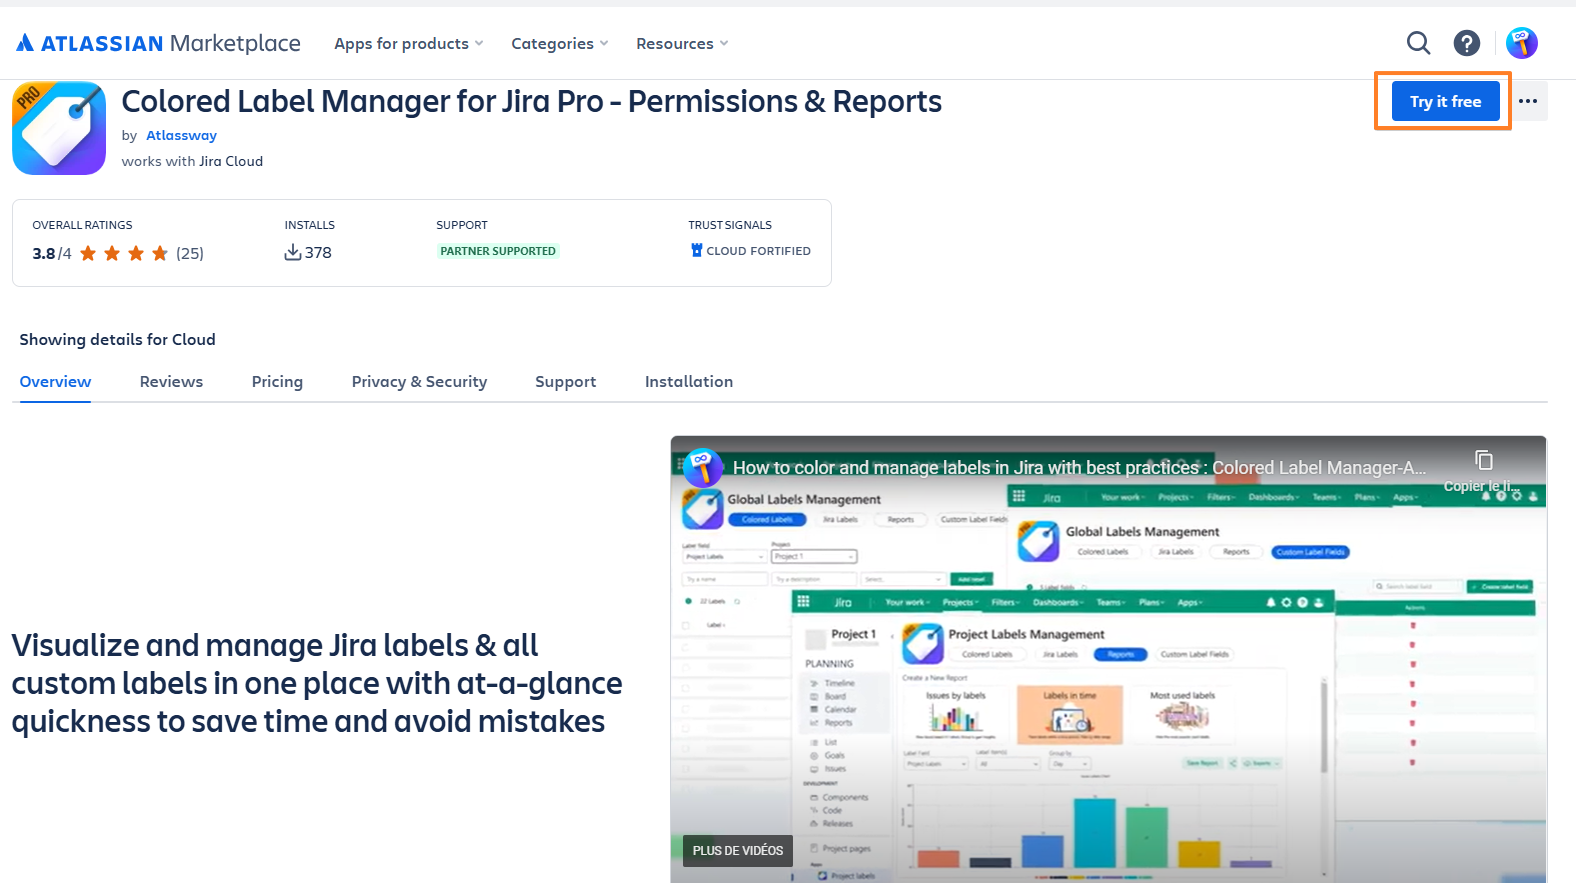
Follow the LINK to access the app.
-
Log in with an account that has Jira Administrator Permissions on your instance.
-
Click “Try it Free” to start the 30-day trial.
-
Select your instance to proceed.
Create a Colored Label Field
Only Jira Administrator can create a Colored Label Field
Steps
-
Log in As a Jira Administrator
-
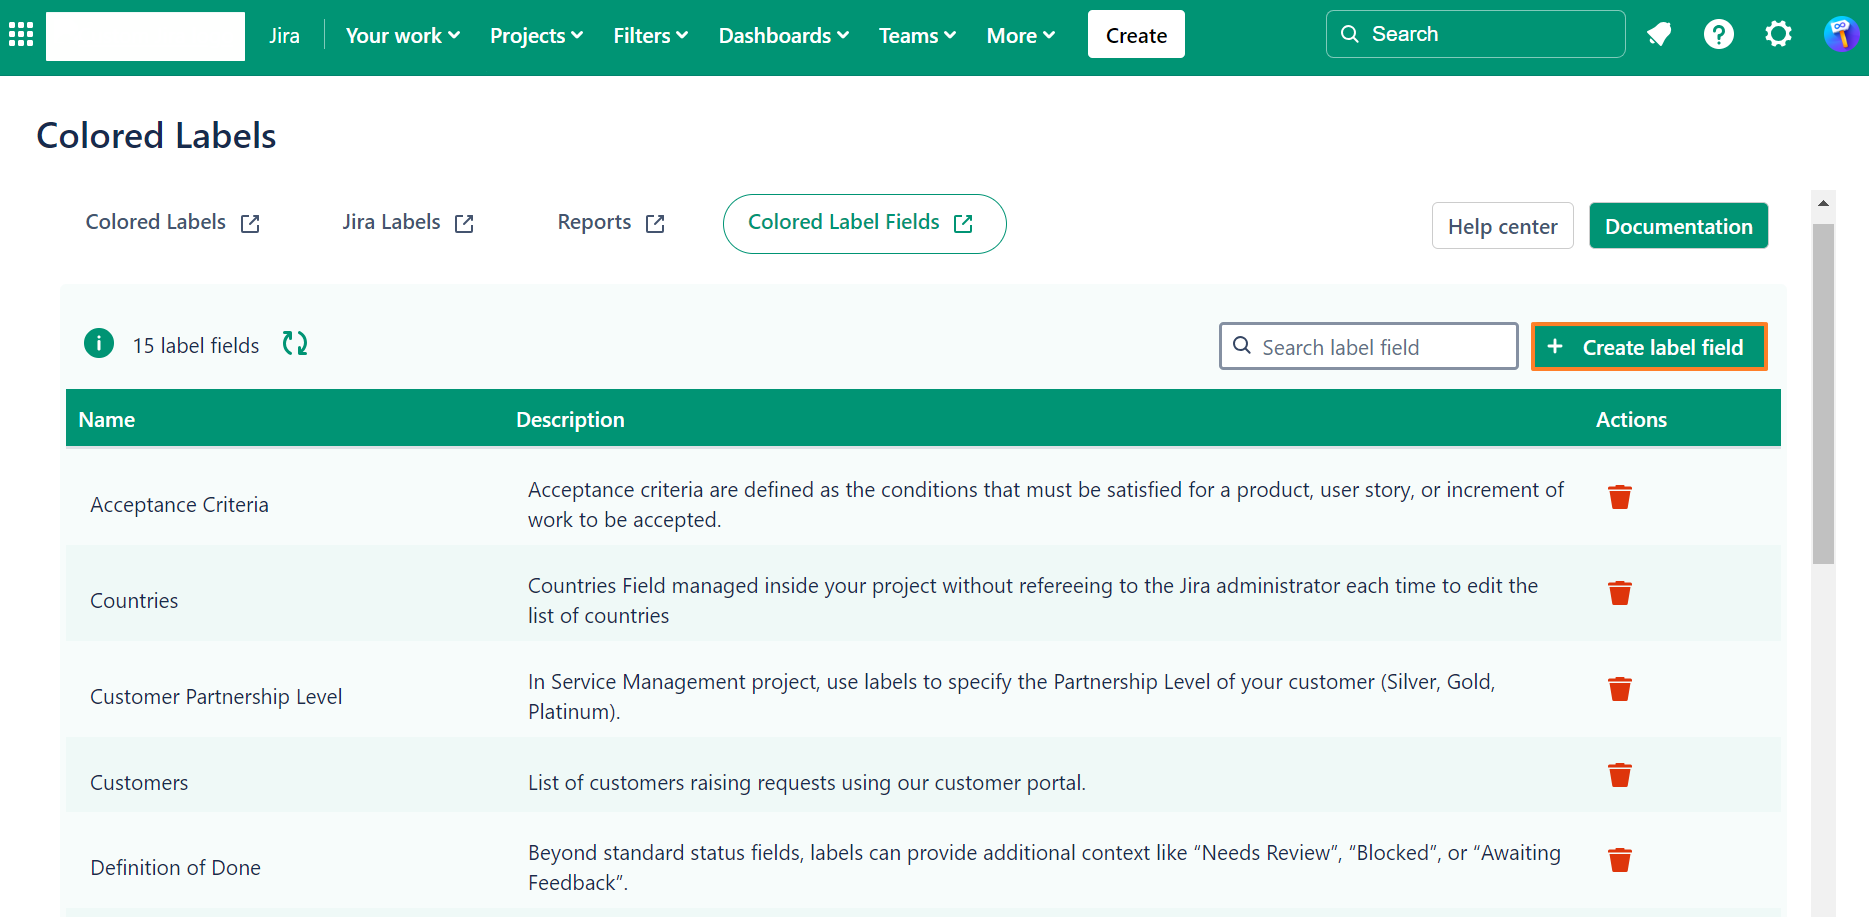
Click on Apps
-
Go to → Colored Label Manager
-
Click on Colored Label Fields
-
Click on Create Colored Label Field
-
Enter a Name and Description
-
Click Create
You can create multiple label fields for different use cases, such as:
-
Project Phases
-
Feature Areas
-
Team Responsibility
-
Definition of Done (DoD)
-
Definition of Ready
-
Acceptance Criteria
-
Simple Select List
Colored Label field in Company-maanged and Team-managed
-
If you are using a Service Management project, label fields are automatically added to your screens.
-
To use label fields in a Software project, you must manually add them to the appropriate screens.
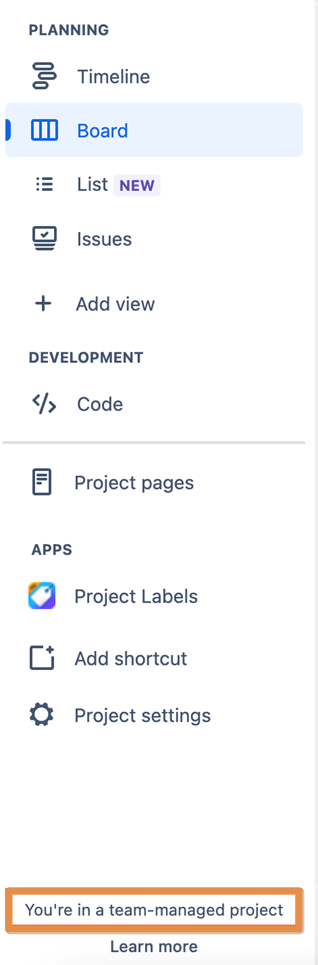
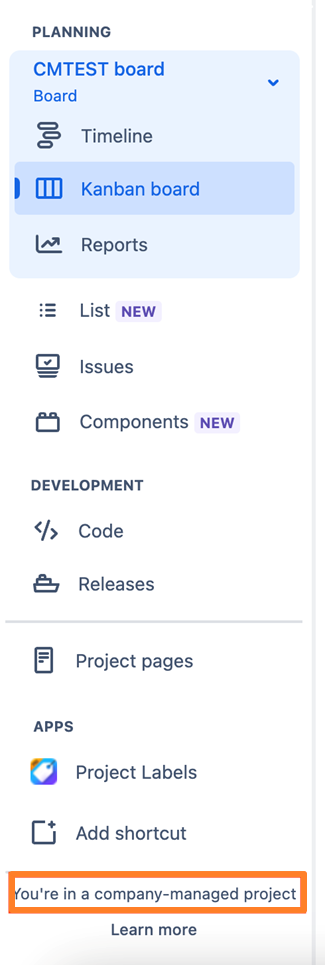
To determine whether your project is Company-managed or Team-managed, check the bottom of your project’s left-hand sidebar:
-
If you see an icon or message stating “You’re in a team-managed project” along with a “Learn more” menu item, you are in a Team-managed project.
-
If you don’t see this, you are likely in a Company-managed project.
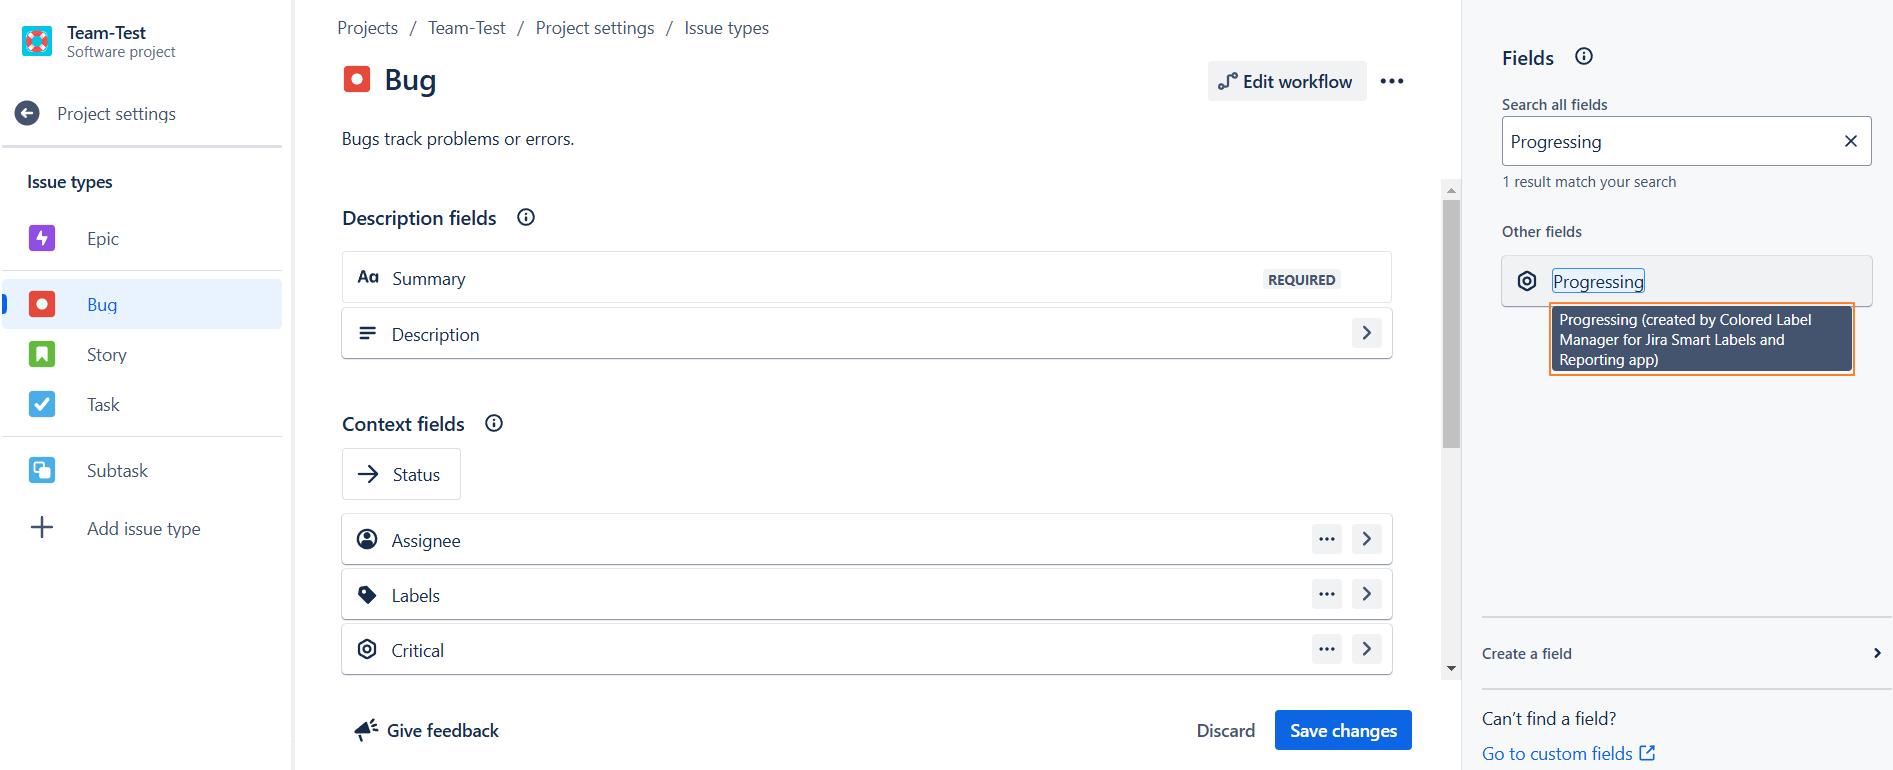
Team-managed project
Add Colored Label Field to your layout
-
Go to Project Settings.
-
Select Issue Types.
-
Search for and add your Colored Label Field then click Save Changes.
--> A message will appear indicating that this field was created by the Colored Label Manager.
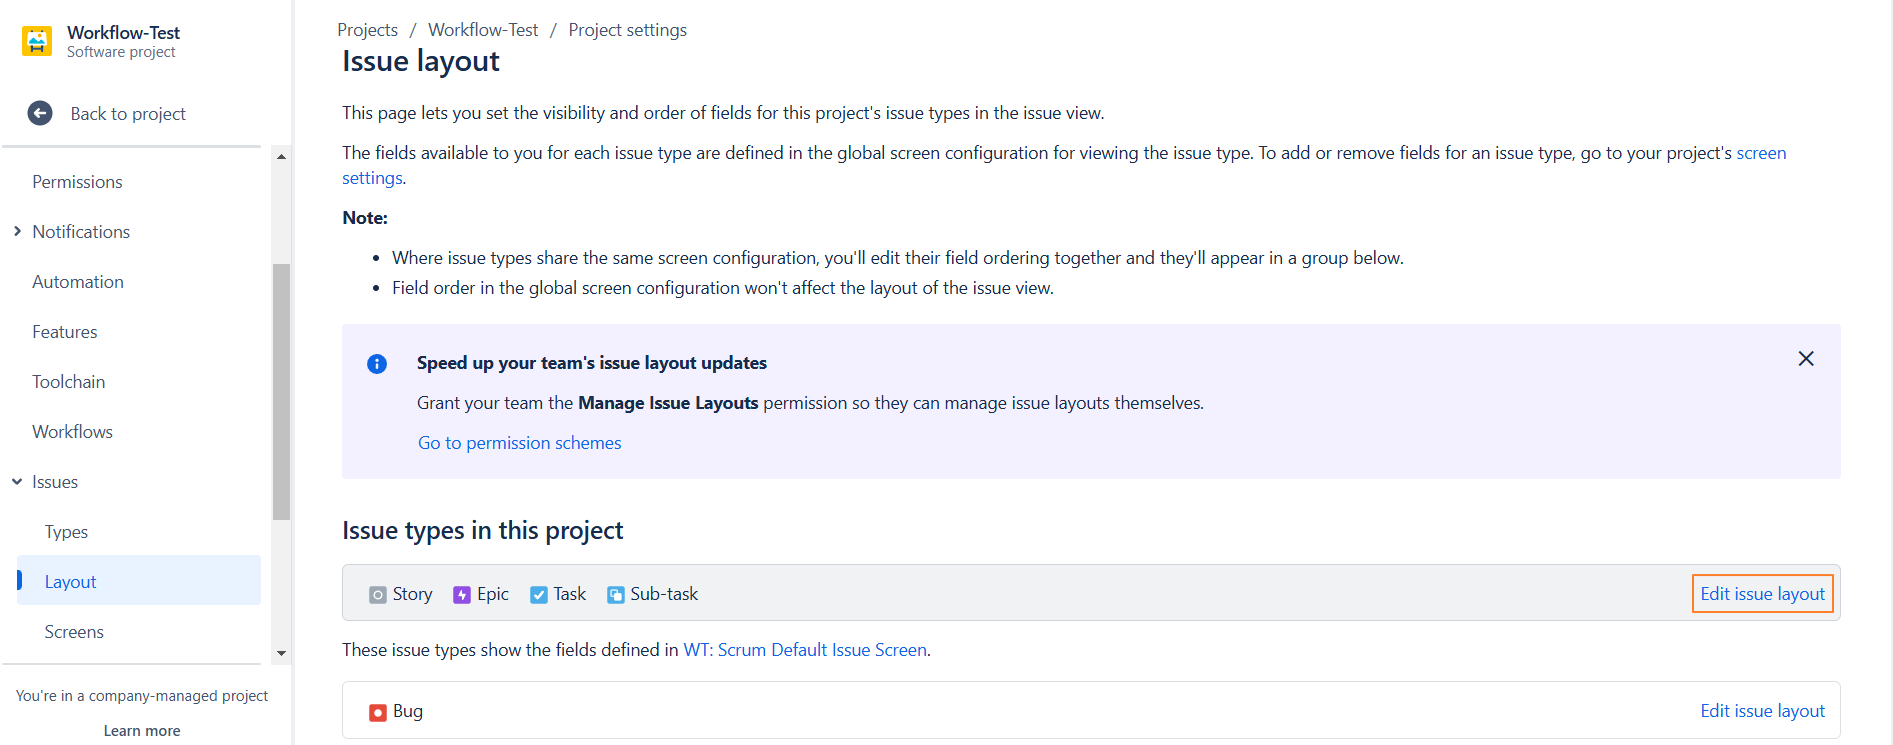
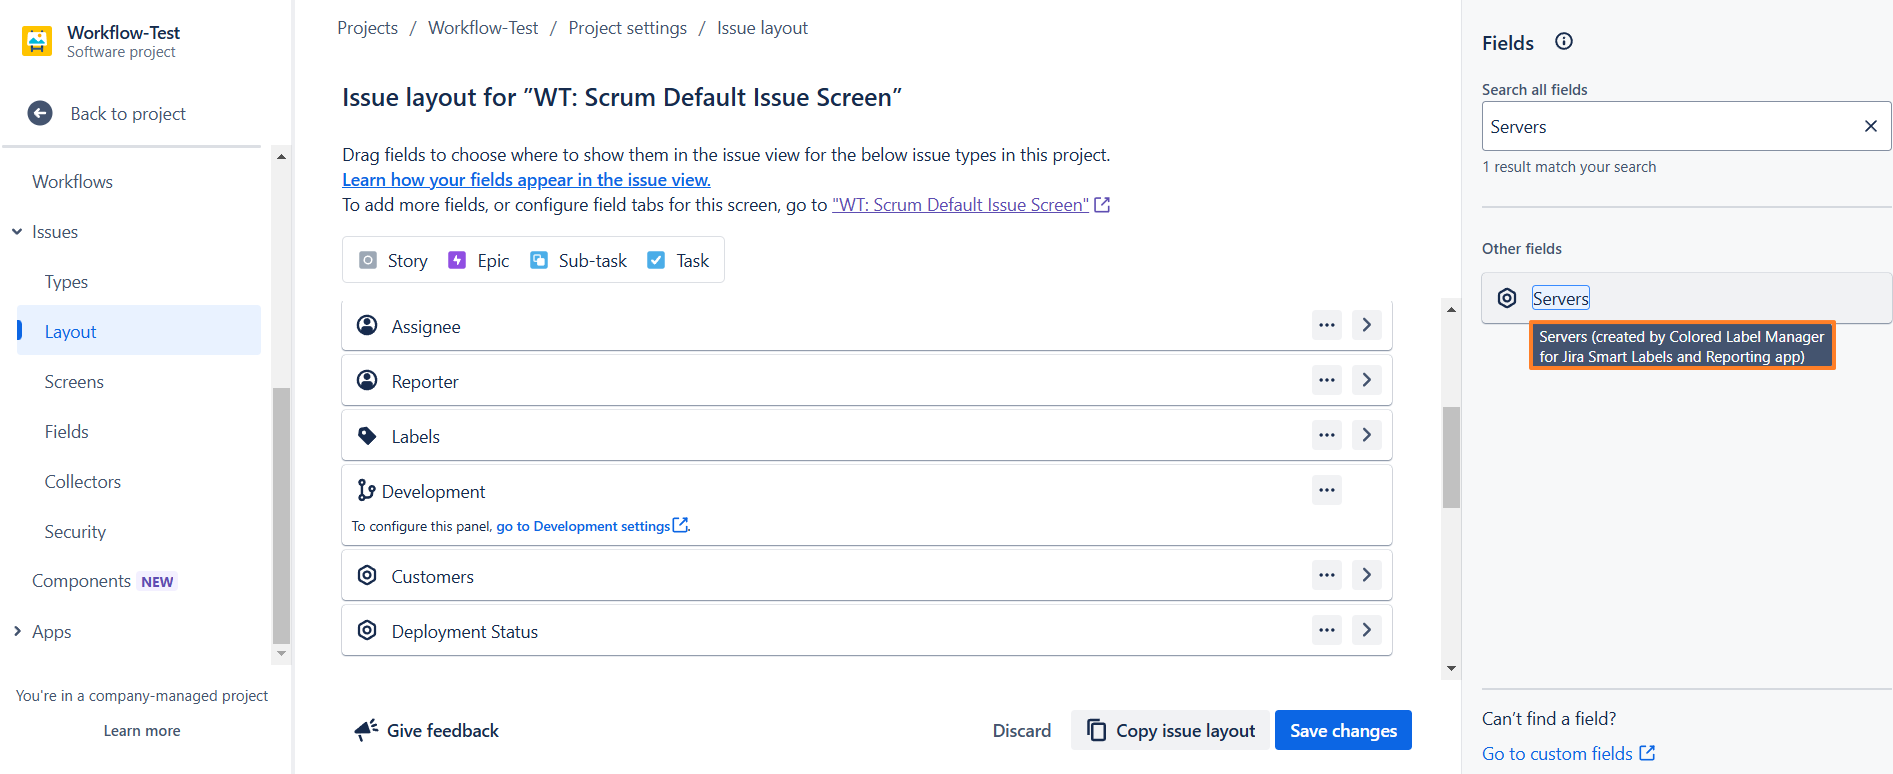
Company-managed project
Add Colored Label Field to your layout
-
Go to Project Settings.
-
Select Issues > Layout.
-
Click Edit Issue Layout.
-
Search for and add your Colored Label Field then Click Save.
--> A message will appear indicating that this field was created by the Colored Label Manager.
Need help?
💡 We're here for you! If you have questions or need to report a bug, visit our Help Center and raise a support ticket. Our team is ready to assist you!